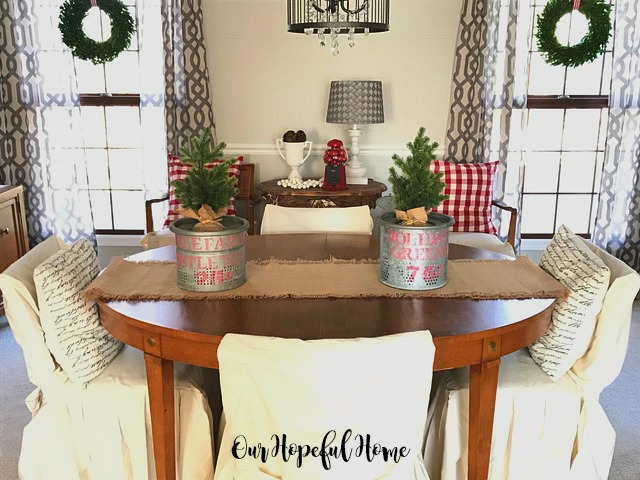
The first items I added were two boxwood wreaths, one hanging in each window with red striped ribbon. I love the look so much I might just have to keep them up year-round! And yes, that's still some fall decor you see on the dining room table. I love that vintage toolbox and was sad to have to move it. In years past I've filled it with greenery to create a gorgeous Christmas centerpiece, but not this year.
I've always loved decorating at Christmas with bubble gum machines, usually as DIY snow globes. This time I chose a simpler idea -- I just filled one with vintage red glass balls. Then I filled the trophy with pine cones I collected from the yard in years past.
I meant it when I said I might just have to leave the wreaths hanging in the windows even after Christmas. This picture shows a different Christmas pillow that I also use in the dining room -- it's featured in my From Place Mats To Pillows -- In 3 Easy Steps tutorial from a couple years ago. I might even be making a few more place mat Christmas pillows this year yet!
The vintage tool caddy was eventually removed and I replaced it with these vintage minnow buckets. You can see how I painted them to resemble much more expensive farmhouse buckets you may have seen on Pinterest. I turned them into my own DIY Holiday Greens and Mistletoe Galvanized Buckets that are so versatile for Christmas decorating. I filled them with small burlap- wrapped faux Christmas trees.
I love how the paint came out just the right shade of red -- faded and old-looking, just like the vintage buckets themselves.
Tree Farm Mistletoe 25¢
Holiday Greens 75¢
For the piece de resistance I added a metal lantern that's filled with a bottle brush tree and an adorable retro camper!
Isn't it adorable? The real kicker is that it's decorated for Christmas!
Gotta love the wreath and those Christmas lights!
So here's the table without the lantern.
And here it is with the lantern. Either way I think it's a simplistic enough design to fit my "less is more" decorating motto for this year.
I also decorated the other buffet table but I'm saving just how I did it for another day! (I know, the Christmas clock is ticking!) So stay tuned!
Well, that's it until next time, friends!
I hope you enjoyed reading about
my Understated Christmas Decor
in the Dining Room.
Be sure to stay in touch:
Just click on my Facebook, Pinterest, Twitter or Instagram icons in my top right sidebar. You can also sign up there to receive my blog posts via email as well.
If you sign up via email, you should receive a confirmation email in your inbox. If not, please check your spam folder(and/or your "Promotions" folder if you have gmail)!
Thank you!
Don't forget to Pin it!
Don’t miss another thrifty,
DIY home decor post!


Leave a Comment!
I love it, Kathleen! I'm with you - the wreaths need to stay! So many great elements. Your dining room looks wonderful!
Hugs,
Cecilia
Your dining room looks fabulous!
I'd put a spray of daffodils or apple blossoms on those wreathes and keep 'em up till past Easter! Your home is beautiful; serene but little bits like the camper add a bit of humor, too!
Post a Comment