I'm a huge fan of stenciling. As such, I think I can say that I've stenciled more than my fair share of furniture pieces and various home décor items over the years. But I recently came across an idea for a stenciling shortcut, of sorts. (It's really a cheat.) And it worked out so well that I wanted to share it with you.
They weren't too badly banged up, but I'm not exactly the black lacquer type. So I knew that at a minimum, a paint job would be in order. But the trays sat around forever. Until my recent birthday, that is. Mr. CBD knows me so well, and one of the things he got me for my birthday was a FolkArt Home Décor Chalk (paint) Starter Kit. (I am not getting paid for anything I say about this product. I just wanted to share with you what I used.) I got another cool paint kit I'll be sharing with you as well in another post.
Ok, the box says it's a $34.00 value. I'm not sure about that. What I am sure about is that Mr. CBD is as thrifty a shopper as I am because he paid around $4.00 on clearance. Yes. $ 4.00. So not only did I love the gift but I loved that he got it for such a steal! The kit came with two paint colors, Cascade (turquoise) and Sheepskin (cream) along with clear wax, two paint brushes and two stencils!
I always had it in the back of my mind that I would stencil the trays somehow, either on the outside or on the inside. Then I stumbled across this at the Dollar Store.
Contact paper. I've use their rolls of clear contact paper to make my own stencils, but this is the first time I'd seen this pretty gray and white pattern before. It looked exactly like the stencil pattern I had in mind for the tray project from the beginning! I loved it! So of course I had to buy it, knowing that I would use it in some way on those black lacquer trays. I came to the conclusion that I only wanted it as an accent pattern, not an overall pattern, so I decided to use it as a lining on the inside of the tray.
Before I started painting it I laid the tray on top of the contact paper and traced the outline of it. Then I cut that out and put my new "lining" aside for later.
I went on to paint the outside and part of the inside (just not the bottom) of the tray with the Sheepskin chalk paint. I didn't prime first, but I did sand the glossy surface so that the paint would adhere better. Since the tray was black it took three coats to get good coverage. Once painted, I sanded the edges a bit to give it a distressed look. After it was fully dry I inserted my contact paper and used gentle pressure to smooth the adhesive-backed paper across the bottom of the tray.
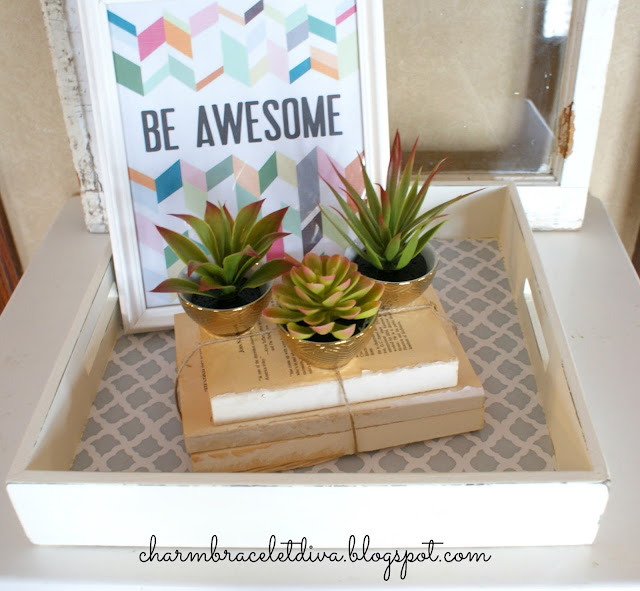
Here she is painted. I think it gave the tray such a lighter, brighter, cleaner look, don't you? Now that I know I like this one I can go ahead and give the same treatment to the other one. I'll be using them on top of side tables and for organizing the top of our large upholstered ottoman.Who knows, I might even use them as, well, trays to carry things on!
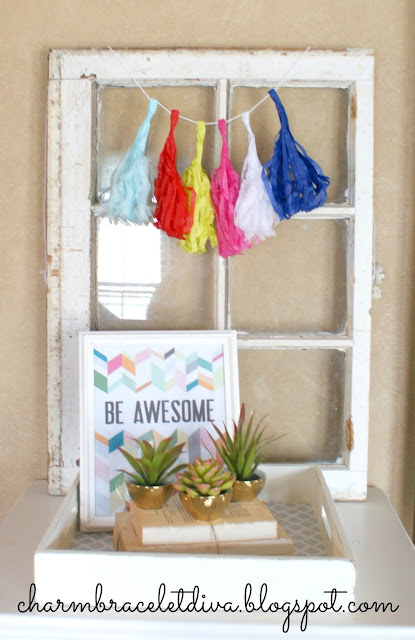
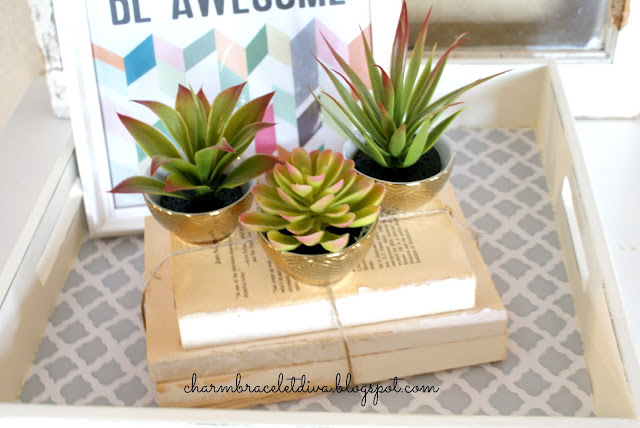
Right now I have it set up with my Dollar Store mini succulents. I added some homemade book bundles and a free "Be Awesome"printable I found on I Heart Naptime. It was created by April from illistyle.com You can download it (for personal use only) from illistyle.com.
Here you can see the adorable gold porcelain cups I picked up at Target on sale. I knew when I saw them that they would be perfect for these sweet little cacti. Well, at least I hoped they would be and I was right! The colorful tassel banner is from Target's Dollar Bin.
So, to recap:
AND
So what do you think? I think I'm in love.
I haven't waxed it yet since I can't decided if I want to stencil something on the outside of it first. Should I stencil something on the outside of it or just leave well enough alone? What do you think? I'd probably go with stenciling something French or farmhouse-inspired.
Well, that's it for today, friends!
I hope you enjoyed reading about
How To Use Dollar Store Contact Paper
For Faux Stencil Effect.
Don't forget to Pin It!
Be sure to stay in touch:


Leave a Comment!
Great tray upcycle Kathleen! So...you must have a nicer dollar store in your area--the succulents at ours do not look near as nice and I've never seen the contact paper.
OMGosh--you ARE awesome! And your husband too for getting such an incredible deal. Can I tell you that I was at the dollar store yesterday holding that very package of contact paper trying to think of what I needed it for?! Now I know :) Great project, Kathleen--
That turned out so great, Kathleen...I'll have to look for that paper! Thanks for sharing!
Really great, good job my dear Kathleen, the paper you've chosen is truly wonderful, thank you for sharing your idea and what you gave life to !
Have a wonderful remainder of your Sunday,
sending dear hugs and smiles to you
Dany
Oh how great is that?
Thanks for the great ideas !!!!
Rainy greetings
Antje
Cute transformation! Love the price on your husband's find! Nice shopping!
Post a Comment