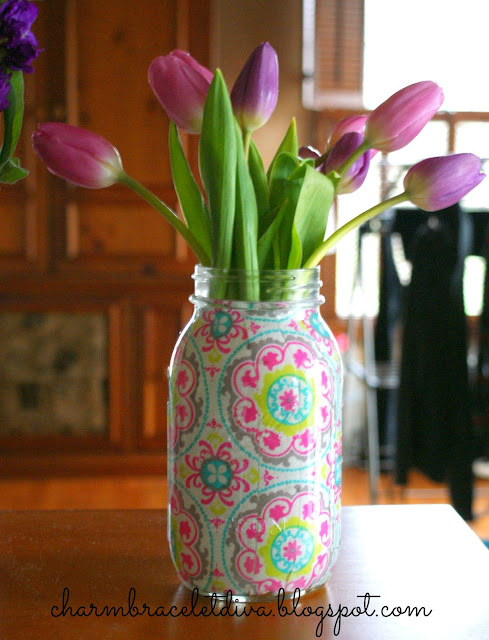
I had fun this past weekend putting together a DIY project for one of my monthly challenge groups. This challenge was for my "Dose of DIY" group and the challenge was to use glass bottles, vases or Mason jars to create something awesome with our DIY skills. I chose to use Mason jars for my project and I had a real blast putting it all together. I loved the project so much that I really couldn't wait to share it with you!
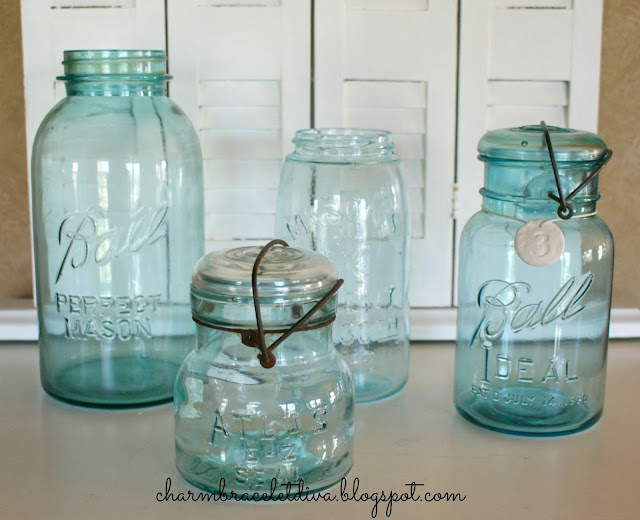
First off, let me just say that I. Love. Mason. Jars. I've collected vintage Mason jars for a few years now and have amassed a respectable collection.
Here are a few of my favorites. However, for this project I chose to use everyday Mason jars, not my vintage ones. I love them pretty much "as is."
In preparation for this challenge I created a Mason Jar Pinterest Board. While doing so, I came across quite a few ideas, although most of them I'd seen before. Until I came across a Mason jar decor idea from Amanda at Dwelling in Happiness and I knew I'd found my project for this challenge! Her DIY Spring Vases absolutely won me over and I just had to try the technique out for myself. It's pretty simple as well as inexpensive so I think you're going to like it!
MATERIALS
*1. 1/4 yd. fabric per jar
*2. Mod Podge
*3. Paint Brush
*4. Mason Jar(s)
*5. Scissors
I chose three bright, complimentary florals in honor of spring.
Here's one of the basic jars I used. All three were 6 1/2 inches tall. Two jars had a 2 inch mouth opening and the largest one had a 2 1/2 inch mouth opening. For all three Mason jars I ended up using a piece of fabric that was 12" long and 10" high. 1/4 yard of fabric is more than enough to cover one jar.
Then all you do is cut the fabric into strips, about 1/2" to 1" wide, until you've cut it all. Then the real fun begins. Pour some Mod Podge into a bowl, grab your paint brush and get busy. You simply "paint" the front side of the strips with Mod Podge and adhere them onto the inside of the jar, one by one until you've covered the entire thing with your pretty fabric.
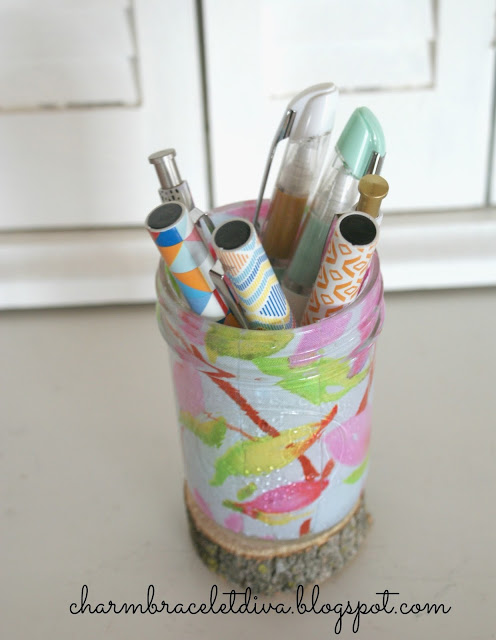
Remember: the paint brush is your friend. You can use it to help smooth out bubbles and/or wrinkles as well as for the precise placement of the strips. I have to tell you that I loved this project so much I had a real hard time stopping! In addition to the three jars I originally planned to use, I went ahead and used a fourth, smaller Mason jar for holding things like pens, etc. I swear I really couldn't help myself!
Using fake flowers in these vases will not be a problem. But since I absolutely love fresh flowers I had to come up with a way to to put the flowers and water in the jar without causing the fabric to come off. My solution? Use another cup that fits inside the jar and use that as the real "vase."
Here are the inserts I used. But make sure you have the inserts figured out before you start decorating your jars. It's easy to underestimate the size of the jar mouth without actually placing your insert inside the jar. Trust me, I'm speaking from experience here.
My only regret is that I did not make my fabric strips tall enough so they did not cover the inside of the jar at the very top. After the Mod Podge dried (in a few hours) you could still see it all over the tops of the jars. Here they are after I cleaned them up and got rid of the excess Mod Podge. I had to use Goo Gone to wipe the jar tops down to get rid of it. Lesson learned for next time.
Well, that's it until next time!
I hope you enjoyed reading
Modern Mason Jar Decor.
Thanks for spending time with me today!

Click HERE to subscribe.
Don’t miss another thrifty, DIY
home décor post!


Leave a Comment!
I just love these what a great way to bring pattern to mason jars ...the colors you used are adorable!!!
Kathleen, these are so stinkin' cute!!! The possibilities are endless and I am already thinking of ways to do a few! Thanks so much for a great idea!
These are so beautiful. So you put the fabric inside the jar? Do you add more mod podge once you adhere the fabric
Wow, Kathleen, they are beautiful! Be careful... manufacturers will probably steal your amazing idea! Thank you for the tips too... I'm going to try this for my windowsill! I'm a mason jar lover and will hop around your site for more ideas =D
Kathleen this is so beautiful! What an awesome project!
These are so pretty! I'm thinking about all the possibilities right now. Great tutorial too!
How pretty! Love your fabric choices. And I'm in awe that you were able to match the pattern so well. I'm pretty sure if I attempt this project (and I really want to) my efforts won't be as neatly even.
This is such a cute and easy idea! Also I would definitely love to bring one as a wonderful hostess gift.
These turned out so lovely! I enjoy seeing a new mason jar idea and wonderful fabrics, too!
Your jars are beautiful Kathleen! Love the fabrics you chose. So pretty in pink for spring.
What a wonderful idea to add some color to a room - very beautiful! Blessings!
I think Mason jars are an essential part of decor!
Now to go shop for some pretty fabric. I love your choices. Any advice for matching the patterns? Yours are perfect!
I adore how those look! I keep picturing how cute they would be in a girls room filled with things they need as well as flowers. The prints you chose remind me of Lily Pulitzer.
I would love for you to share you post with the Creatively Crafty link party http://tryit-likeit.com/link-party-it #CCBG
Loved your spring colors. I saw somewhere where the blogger covered the threads of a Mason jar with jute. I think several rows of colored jute or a 1/2" ribbon would camouflauge those tops nicely. Even a row to the material on the inside--but it will narrow the neck a bit more.
I love this idea and the inserts are genius!
Post a Comment