There's nothing like finding the real deal at a flea market. It could be a vintage globe. Or perhaps some rusty old industrial pieces you just have to have. Or maybe it's architectural salvage. Sometimes it works out perfectly like that. And sometimes you end up taking whatever's available to you and turning it into something almost as amazing. That's what happened to me recently after I picked up two brand new plain jane storage crates at my local home improvement store. They seemed almost too pristine for me, although I did see the potential in them for something greater.
Here's one of the crates. I paid $5.00 each for them. While I loved the price I did not love their newness and the plain jane look of them. I wasn't sure what I'd be using them for but I knew I would figure that out later.
Enter one rolling plant stand ($2.99 from Goodwill) and I had my light bulb moment. Why not attach these wheels to the storage crate and use it in my pantry? So that's what I did. But not before I took my paintbrush and some stencils to it first.
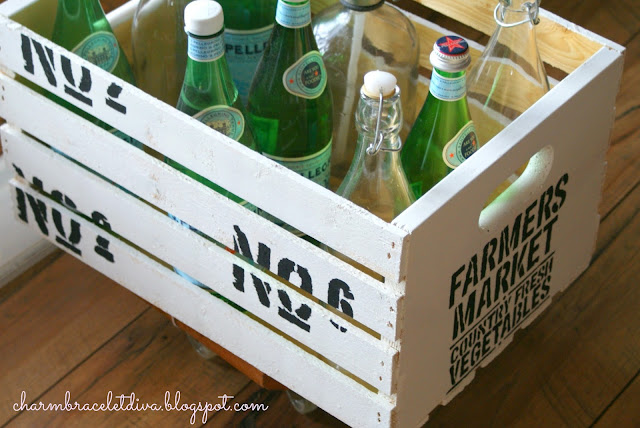
First I gave the crate two coats of white paint. The wood soaked it up so well that I actually ended up with only a dull white finish. But since I was going for a vintage look that was fine. Still, though, I felt that it was sorely in need of something. Enter my vintage-inspired Folkart Farmers Market laser stencils.
Courtesy of Wal-Mart. Sometimes I am so amazed at the things they carry in their arts and crafts aisle!
It also came with the numbers 1 through 10, a "No." and a star.
I was so happy to find out about this great deal from my friend Diana over
at Adirondack Girl at Heart. Thanks, Diana!
I couldn't fit all the words from the stencil onto the crate, but that was ok. I liked the way it happened to fit. I also knew even before I bought the stencils that I wanted to stencil some numbers onto it (I always stencil numbers on things) and lo and behold the package itself showed a design idea for that so I went with it.
I obviously didn't try to make the stencil job look perfect by any means. That's one of the perks of being a self-proclaimed vintage junkie! ("But I like it like this!") I was going for a rustic look, and I think I achieved that here.
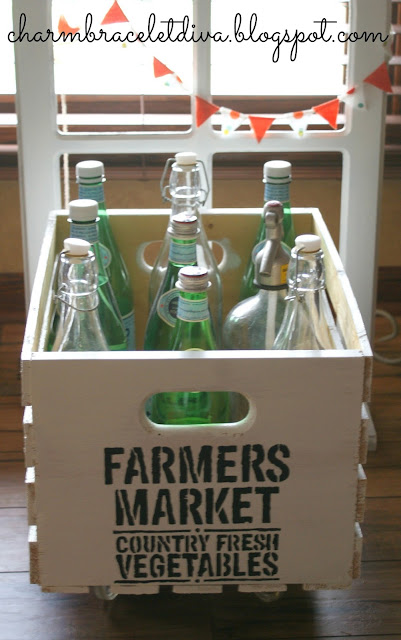
Once all the painting was complete and dry I attached the rolling apparatus to the bottom middle of the crate by tying it on with jute string. I was going to try to glue it on but I thought I might like to take the wheels off at some point in the future so I didn't want to make it too permanent.
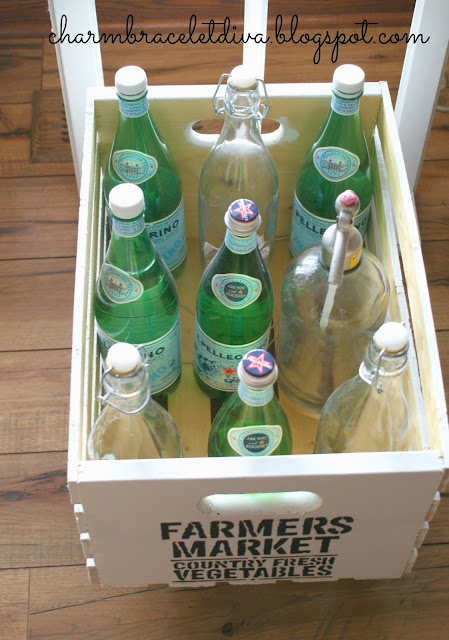
For the photo shoot I had fun styling my Pellegrino water bottles along with my vintage bottles and my vintage seltzer bottle. As an aside I was absolutely thrilled to receive the vintage seltzer bottle for Christmas from Mr. CBD.
The change was not dramatic, but it was just enough to turn this plain jane crate into a more rustic, vintage-inspired storage cart for my pantry. It may not look as impressive once it's filled with cereal boxes and Costco-sized pancake syrup, but I'll love it just the same. Now all I have to do is stumble upon some more wheels for the other cart and I'm good to go.
Don’t forget to Pin It!
How do you organize YOUR pantry?
Be sure to stay in touch:
Enter your email address in the box below
to join my e-mail subscriber list:
Don’t miss another
thrifty DIY
home décor
post!
Kathleen
I'll be linking up here:
My Salvaged Treasures
Shabby Art Boutique
French Country Cottage
The Charm of Home
Decor to Adore
Coastal Charm
The Shabby Creek Cottage
I'll be linking up here:
My Salvaged Treasures
Shabby Art Boutique
French Country Cottage
The Charm of Home
Decor to Adore
Coastal Charm
The Shabby Creek Cottage


Leave a Comment!
Attaching a rolling plant stand to the bottom of your crate was genius. Your pantry crate is fantastic.
I love this Kathleen. We are definitely on the same page, because I have been using those rolling plant caddies for everything! Your crate is fabulous!
I love this! You've given a bland crate some personality. I rearrange my pantry about once a month, which means its still not working for me :-(
Amalia
xo
Sure hope can find that stencil, loving how it looks on your crate, awesome job.
smart idea putting rolling plant base under crate also, buying casters not inexpensive anymore if ever were.
We bought four casters at Harbor Freight (to turn dresser into tv stand) which is way on south east side of Grand Junction and we're few miles west of G.J. To buy them at hardware stores close to us was at least double what we paid at Harbor Freight so worth trip when already in G.J.
Love how you placed your stencil, makes your crate look more authentic.
What a deal getting your crate for $5.00. Crates anywhere around here are at least $10 if not $15 depending on size. G.J.is expensive place to live on budget.
Painting your crate white then sanding some helps authenticity also, think I need one of
Really enjoyed seeing how you gussied up your crate, great project.
Enjoy rest of week. Hoping you're having Spring sunshine, all we've had for weeks is rain, then more, and chilly, high here today was 46. Just plain UGH!
I think it's a pretty dramatic change for the good! Love the stencil and the idea of attaching wheels. The thrifty price tag makes it even better. Thanks for linking up your fabulous rolling crate with Talk of the Town.
So clever! This would be great for craft supplies, as well ... my daughter and I seem to always be using the same items .. we could load up the cart and just roll it back and forth between our desks! Yours turned out super cute. Thanks for sharing, Cynthia
This is a brilliant idea!
I love how you used a plant stand with wheels. So smart!
I have often thought I needed a grocery cart to roll feom room to room when picking up messes.
Thank you for joining TOHOT!
What a darling project! I am a bit late to the TOHOT party due to my college semester finals but I'm so glad that I didn't miss this. Have a wonderful week.
What a smart idea - I love that you used a rolling plant stand, I wouldn't have thought of that. Very cool!
Julie
LiveFromJuliesHouse.com
That is cute and I love the wheels! Thanks for sharing at Home Sweet Home!
Post a Comment