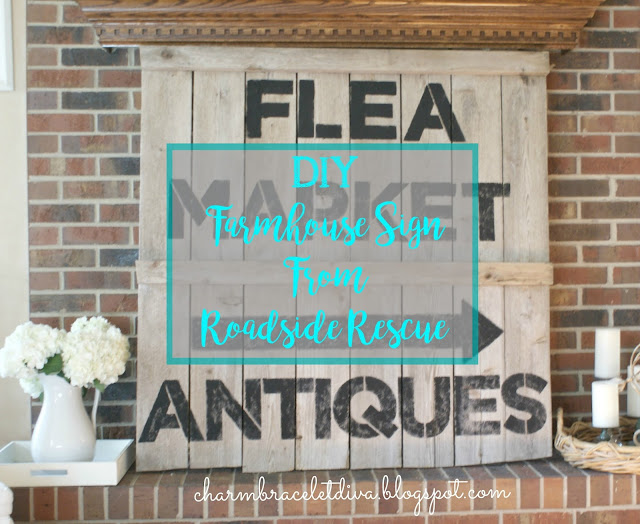
Yes, you read that right. DIY farmhouse sign from roadside rescue. I've never seen a farmhouse sign I didn't like, so you know how happy I was to find a roadside rescue right down the street from my house that I KNEW would be just perfect for some DIY farmhouse magic. I was equally happy to have a wonderful husband who, despite thinking I'm crazy for wanting to pick through other people's trash, still loves me and was willing to go back with our van and pick this beauty up.
This post contains affiliate links. A purchase of any one of these items
helps to support this blog and its creative efforts at no cost to you. To
read more, please see my disclosure page.
Ok, so she had some cosmetic issues. Good thing I love chippy, shabby things! This one half of a wood fence gate fit that bill perfectly for sure. First off, you can see that it was not symmetrical on each end. One side had a bit of a decorative curve to it.
Further, there was quite a bit of rot going on in at least one place.
And one of the support beams along the back side of the gate door was clearly ready to fall apart. No surprise they replaced this with an entirely new fence gate. But their misfortune ended up being my good luck find!
At my request, my husband sawed off the uneven portion and the broken
pieces and removed the damaged support beam. That left me with a nice,
clean, huge ( 4 feet x 4 feet) blank wooden sign to play around
with. And play I did. I had an idea right from the start for a sign that
I'd been thinking about for quite some time.
DIY FARMHOUSE SIGN MATERIALS
1.
12x12 alphabet stencils
2. painter's tape
3. black acrylic paint
4. tape measure
5. black Sharpie
6. pencil
7. paint brush
8. piece of weathered wood
I purposely chose to paint on the back side of the gate that had the two supports running along it, one at what was now the top, and one in the middle. I had an idea in mind that the middle wood beam would become a "shelf" of sorts that I could use to display items on (like frames) when the spirit moves me. I also saw me adding small, undetectable cup hooks underneath the beams that I could hang things from, like seasonal garlands and such. I can't wait to decorate it!
The hardest part was spacing out the stencils so that the letters and words looked even. I used a measuring tape as a guide, creating an imaginary "line" on which I set each stencil. I used painter's tape to tape each stencil to the wood to keep it from moving while I filled it in with paint.
Here it is, completed, on a table in the garage. You can see that one of the boards is a bit longer than the others across the bottom. My husband wanted to fix that but I had him leave it that way since I wasn't sure how much more sawing the wood could withstand before the integrity of the sign became compromised. Plus, it wasn't supposed to be perfect! I totally embraced its imperfections.
I had to include a close-up of the gorgeous hydrangeas my husband brought home for me "just because." They sat happily in my vintage ironstone pitcher atop the DIY faux-stenciled tray that I've grown to love for its versatility in decorating just about every room in my house!
I have another decor project I'd like to share with you soon, but I'm also in the middle of a major home renovation (of sorts) project! Up to my ears, you might say. So while I deal with that I might be a bit scarce for a while. But once that major project is done I'll have LOTS to share!

2. painter's tape
3. black acrylic paint
4. tape measure
5. black Sharpie
6. pencil
7. paint brush
8. piece of weathered wood
I purposely chose to paint on the back side of the gate that had the two supports running along it, one at what was now the top, and one in the middle. I had an idea in mind that the middle wood beam would become a "shelf" of sorts that I could use to display items on (like frames) when the spirit moves me. I also saw me adding small, undetectable cup hooks underneath the beams that I could hang things from, like seasonal garlands and such. I can't wait to decorate it!
The hardest part was spacing out the stencils so that the letters and words looked even. I used a measuring tape as a guide, creating an imaginary "line" on which I set each stencil. I used painter's tape to tape each stencil to the wood to keep it from moving while I filled it in with paint.
I also used tape for the arrow. I didn't have an actual arrow stencil
the size I needed for this project, so I downloaded an arrow I found
online and enlarged it in Word.
I printed it out on regular paper, then added the long "tail" you see
in the above picture to make it the exact size/length I wanted. Then I
traced around the outside of it with pencil. Even though I used
premade alphabet stencils, I've been known to make my own
DIY stencils without a silhouette machine. You could always do that, too.
Then I drew over the pencil lines with black Sharpie and painted the
whole thing in.
Here you can see the arrow fully painted. I painted the words first,
then decided where to put the arrow. My main stenciling technique
advice would be that it's best to move your paintbrush from the
outside edge of the stencil in, rather than from the inside of the
stencil out toward the edge. This helps with limiting the potential
for paint bleed under and outside of the stencil, allowing for a
cleaner, crisper outline to your finished product.
I wanted the sign to look vintage so I was not too concerned
with getting even paint coverage. Sadly, I was too heavy-handed with
the paint for the first two words, then I smartened up and went a bit
easier on the paint after that for a more natural, weathered look.
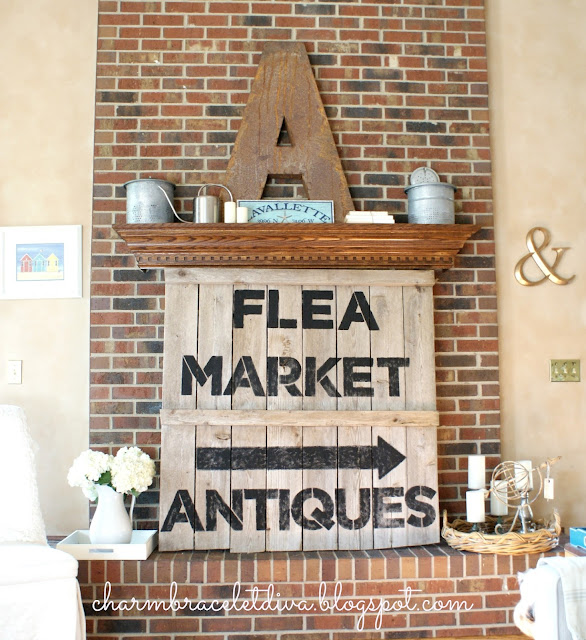
Here it is, completed, on a table in the garage. You can see that one of the boards is a bit longer than the others across the bottom. My husband wanted to fix that but I had him leave it that way since I wasn't sure how much more sawing the wood could withstand before the integrity of the sign became compromised. Plus, it wasn't supposed to be perfect! I totally embraced its imperfections.
I had to include a close-up of the gorgeous hydrangeas my husband brought home for me "just because." They sat happily in my vintage ironstone pitcher atop the DIY faux-stenciled tray that I've grown to love for its versatility in decorating just about every room in my house!
Here you can see the top of the mantel, it's extremely tall and oh so
hard to decorate because of its sheer height. It's about 8 feet or so
from the mantel shelf to the top of the wall. Right now I have a
really large, vintage, rusty, metal "A" on top (approximately 3
and a half feet high), and a bunch of other random stuff that really
has to come down. As much as I love the "A" I think the sign will be a
much better fit. I'll find another place for the letter and
share the back story on its acquisition once it finds its new
home.
Our dog Riley, the ham, photobombing once again.
I have another decor project I'd like to share with you soon, but I'm also in the middle of a major home renovation (of sorts) project! Up to my ears, you might say. So while I deal with that I might be a bit scarce for a while. But once that major project is done I'll have LOTS to share!
Well, that's it for today, friends!
I hope you enjoyed reading about my
DIY Farmhouse Sign
and that I've inspired you in some way.
Don't Forget to Pin It!
Be sure to stay in touch:
Be sure to stay in touch:


I really like large signs. They make such a great statement. Looks wonderful.
ReplyDeleteWow, I love that sign! You did a great job with the stencil in and painting! What a lucky find!
ReplyDeleteI adore your sign at the fireplace! Great accent piece!
ReplyDeleteLOVE your big sign!! You did an awesome job stenciling it.
ReplyDeleteJudy
Your sign is wonderful and so is your hubby for his assist in this project. My family looks at me like I am crazy anytime I want to rescue something from the side of the road.
ReplyDeleteLooks fabulous Kathleen! I love where you placed it and you can't beat a roadside rescue ;)
ReplyDeleteGreat upsycle and rescue! I wish I had a fireplace mantel; the mantel in the cellar with the woodstove is just not the same thing! You did a lovely job with the stenciling--a skill I have not mastered YET! You're lucky your husband helps. Al has started helping me a bit--especially with removing hardware and stuff I don't have the strength for!
ReplyDelete