As an avid DIYer I frequently have "epiphanies" upon spying old things in thrift stores or at estate sales and flea markets. I convince myself that I couldn't possibly live without the item in question (The patina! The price!) and it inevitably comes home with me, along with grand plans for some type of DIY makeover or upcycle project. I'll be the first to admit that not all projects are a success. I've had my fair share of fails. And currently I'm questioning my sanity as I embark upon a long-awaited DIY project that might just get the best of me.
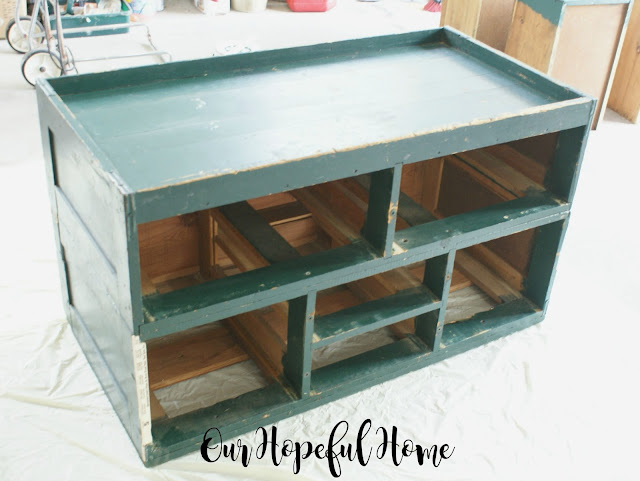
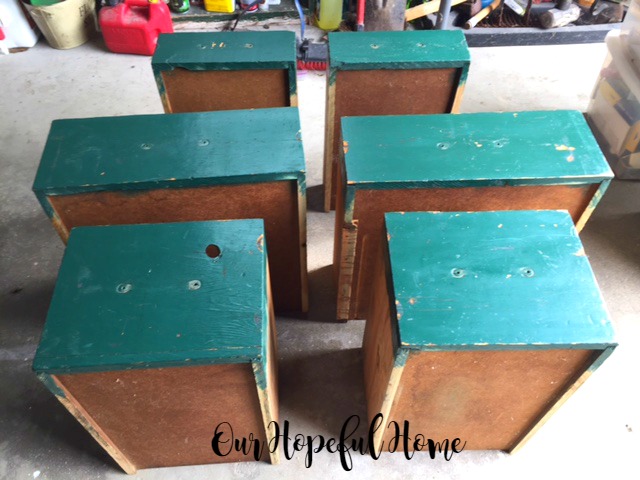
Let's go back to the summer of 2013 when I picked up this behemoth of a primitive wooden cabinet at Michigan's Longest Garage Sale.
It seemed like a great idea at the time, although in retrospect all I can say is "What was I thinking?" I guess I was swept up in the moment of a real deal farm sale and the novelty of it all. We were told that the cabinet was a seed salesman's cabinet. It would travel in the back of the truck from farm to farm as the salesman sold his seeds to the local farmers. Sounds almost downright romantic now doesn't it?
Fast forward to today. It's been in storage, and then our garage for a total of three years and eight months (gasp). I know. I guess deep down I did know what a huge project this was going to be. So here it sits in the garage.
Here's where my husband filled in a gouged out section with, of all things, a paint stirrer. I think it worked great!
Here he filled in another gouged out spot with wood filler.
Let's just say that the cabinet is much more beat up than I thought it was at the time of purchase. So many huge gouges and dings to be repaired before I can even move forward. And the filth! Not to mention the musty odor that STILL clings to it.......need I say more? I really had some blinders on when I bought this one! And to think I was so excited to be buying an authentic piece of farmhouse furniture!
Oh, and the hardware -- not my favorite.
I'd love to change it out with some cup pull label holders like these.
And these? I didn't even know what they were called. They're cast iron butterfly turn latches. Say that three times fast. As much as they were probably needed in this cabinet's prior life, I don't see a need for them now. Besides, they scraped off the old underlying paint and I would not be happy if that happened to the new paint job. So, where does all this leave me? With a list a mile long of all the things I need to do BEFORE I can even paint the darn thing. To wit:
- 1. Fill all scratches, dents and holes with wood putty, let dry and then sand.
- 2. Clean both inside and out with TSP.
- 3. Clean it all again using vinegar to try and get rid of the musty smell.
- 4. Pick out, purchase, paint and attach table legs
- 5. Pick out and purchase new hardware
- 6. Prime
- 7. Choose paint color(s)
- 8. Paint
- 9. Wax
- 10. Order new hardware
- 11. Wait to receive new hardware in the mail
- 12. Assuming it fits, attach new hardware
Okay, so have I forgotten anything? Probably! And for many of you hard core DIYers this project is most likely just another drop in the bucket. But for me it's a HUGE undertaking compared to what I've done previously in my DIY, restored furniture career. And I use the term career here very loosely.
I'm really worried about not being able to get rid of the smell. I mean, that's a deal breaker people. Do you have any tricks for getting rid of musty smells in old furniture? I've researched this and read about all kinds of supposed remedies: charcoal, vinegar, baking soda, laquer, sunshine....even vodka. Yes, vodka! (I think that will be more effective in a cocktail once I'm finally finished with this project! Just sayin'.) Please feel free to leave a comment, or email me directly with your experiences/ideas. I would love to hear about it!
I told my husband that if all else fails he can have the cabinet to use in the garage for holding tools and equipment, etc. And he said no! He'd rather try to sell it. Go figure. So if anyone in the Chicago area is interested in this, I'm all ears. In the meantime, I will be trudging forward with this DIY nightmare, one way or another.
I hope you enjoyed reading about
My Worst DIY Nightmare
and that I've inspired you in some way.
Don't Forget To Pin It!
Be sure to stay in touch:

Click HERE to subscribe.
Don’t miss another thrifty, DIY home décor post!


Leave a Comment!
Aww, I think it's cute as heck! I love it1 All those cute drawers. Looks like it would work as a foot-of-the-bed piece of furniture after you finish it. As for the smell, I've heard cat litter absorbs the odor, although I've never tried it. Probably just airing it out would do a lot for it. I think you scored!
Well, it's an ugly nteresting piece and could be quite nice once redone. As for the musty smell, I've heard cat litter works. I've tried charcoal (kind of worked but not completely) and finally just painted the insides with primer and a couple of coats of paint. Good luck! I do like the piece. Hope you can resurrect it.
Oh auto correct! I meant it's an interesting piece...not ugly. Goodness! Lol
I am in LOVE with this piece of furniture, Kathleen!! Just give it a coat of Bin (primer) and that should seal in the smell--super simple. I wouldn't fill in any scratches or dents; I like them :) Give it a coat or two of paint (latex is fine) and then a coat of poly. I'd also keep the hardware and be done with it. I think it was a great buy--I hear you about the overwhelm, but you can do it!!
I actually like it as it is :-)
Amalia
xo
Ooh, I really like it, Kathleen!
Though I haven't tried it with furniture, I use baking soda frequently to absorb odors. For furniture, I've heard of using coffee but haven't tried it.
Can't wait to see how it turns out!
Post a Comment