Today I'm sharing how to build wooden farmhouse shelves.
I've dreamed of building farmhouse shelves for our dining room ever since my mini dining room reveal in September of 2017. Once the paint and ceiling overhaul was complete I was ready for a totally new look.
This post contains affiliate links. A purchase of any one of these items helps to support this blog and its creative efforts at no cost to you. To read more, please see my disclosure page.
And that required removing the old, traditional china cabinet that took up an entire wall and replacing it with farmhouse shelves. It may have taken me a year -- but those farmhouse shelves are heeere!

Here's the wood I decided to go with. The planks are 4 feet long and 3 1/2 inches wide. After attaching two of them together that gives each shelf a depth of 7 inches.
To prep the shelves I gave them a light sanding with my electric palm sander, basically to get rid of any areas that had the potential to cause splinters. I tested an area with tongue oil to see if it would change the color of the wood but it didn't seem to make any discernible difference so I decided to forego the tongue oil altogether.
If you don't own a palm sander you can purchase a Black + Decker palm sander. Mine has come in very handy for many day-to-day DIY projects.


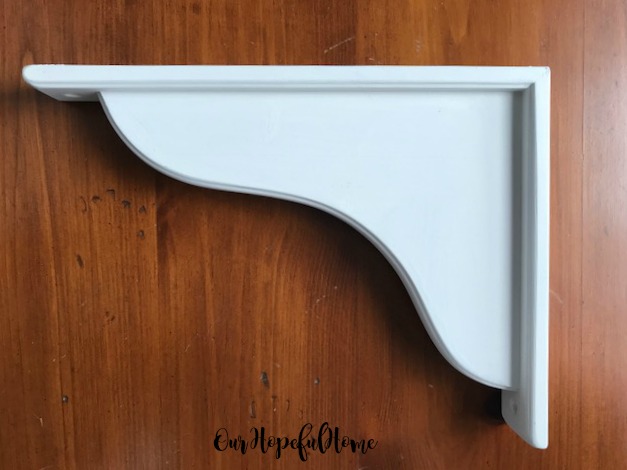
We purchased the Hensvik corbels from Ikea for $7.50 each. Their dimensions are 7" x 9 1/2"and they're reversible, so they fit both 7" and 9 1/2" deep shelves. Their size worked out perfectly for our 7" deep shelves. While the color was perfect, the finish was not. They looked too shiny and new for my taste. So I got out some of my Dixie Belle Chalk Mineral Paint in Fluff and got to work.

Not that I plan to display anything incredibly heavy, but due to the length of the shelves I wanted to use 3 corbels, rather than 2, just to be safe. However, we ended up using a different number of corbels as explained below.

If you don't have access to an Ikea store, you can always purchase a set of similar traditional white corbels online.
Here's what that side of the dining room looked like before we installed the shelves. One big blank wall. I love the farmhouse sign, but I knew the shelves would be coming eventually so I purposefully never permanently hung it.
Here's the stark reality of the empty wall and dining room sideboard, basically stripped naked.
First my husband placed one of the completed shelves upside down. Then we chose the spacing for the corbels. We basically placed one on each end of the shelf and one in the middle.
In order to be able to see a "dry run" of sorts, he then attached the corbels onto the shelf by "temporarily" putting in the one screw that attaches the corbel to the shelf with our power drill.

He then used painter's tape to help secure the corbels more fully for our experiment.
He was then able to flip the shelf right side up and hold it against the wall so that we could see where we actually wanted to hang it.
Once I picked a height he made a pencil mark, then took out the laser level to make sure he was hanging it evenly.
And voila! Shelf number one was up and looking good. From the top of the buffet to the bottom of the shelf was 21 inches, and then 19 inches between the bottom shelf and the top shelf. Those measurements worked for me, knowing the types of things I'm likely to display there. You might want to use totally different measurements depending on the size of things you think you'll be displaying.
This vintage-inspired farmhouse scale is from Decor Steals. The mini olive buckets filled with greens proved to be the best spot for some of my white mini clip-on pumpkins! I am totally in love with this display.
It's difficult to see in the photo but trust me, after painting the corbel, its finish was so much more in keeping with the vintage-inspired farmhouse aesthetic that I was going for. Just one more step and the corbels would be perfect.
That one more step was "distressing" them. In keeping with the farmhouse vibe, I faux distressed them with my Plaid Folkart layering block. You can read all about that process here. I found so many corbels that fit the bill, but they were all so expensive. I knew I had to buy what I could afford and make it work. The faux distressing was just what I needed to get the look I want.
Once the corbels were ready it was time to put the shelves together. I did that by using 4 inch mending plates to attach the planks to each other. I used four plates per shelf, eyeballing their placement and using our electric screwdriver to attach each of them with the screws provided. In retrospect I believe I could I have gotten away with three plates. But as they say, hindsight is always 20/20. I was, however, careful not to place the plates where I thought the corbels would eventually be attached to the shelf.
Once the corbels were ready it was time to put the shelves together. I did that by using 4 inch mending plates to attach the planks to each other. I used four plates per shelf, eyeballing their placement and using our electric screwdriver to attach each of them with the screws provided. In retrospect I believe I could I have gotten away with three plates. But as they say, hindsight is always 20/20. I was, however, careful not to place the plates where I thought the corbels would eventually be attached to the shelf.
With or without the shelves, though, I would still love my modern farmhouse dining room.
Here's the stark reality of the empty wall and dining room sideboard, basically stripped naked.
First my husband placed one of the completed shelves upside down. Then we chose the spacing for the corbels. We basically placed one on each end of the shelf and one in the middle.
In order to be able to see a "dry run" of sorts, he then attached the corbels onto the shelf by "temporarily" putting in the one screw that attaches the corbel to the shelf with our power drill.

He then used painter's tape to help secure the corbels more fully for our experiment.
He was then able to flip the shelf right side up and hold it against the wall so that we could see where we actually wanted to hang it.
Once I picked a height he made a pencil mark, then took out the laser level to make sure he was hanging it evenly.
And voila! Shelf number one was up and looking good. From the top of the buffet to the bottom of the shelf was 21 inches, and then 19 inches between the bottom shelf and the top shelf. Those measurements worked for me, knowing the types of things I'm likely to display there. You might want to use totally different measurements depending on the size of things you think you'll be displaying.
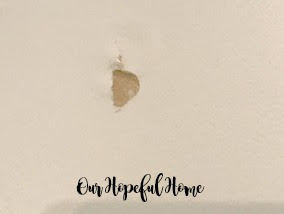
Just a word of warning, though. The laser level attaches to the wall with a velcro-sided sticker. Just like a 3M Command Strip, it's supposed to come off the wall without leaving a mark. Ours, unfortunately, did not perform as promised. When he took it down it left a gaping hole in the otherwise pristine paint job. Ugh. But after a little spackle and elbow grease he patched the hole and moved on.
Perhaps we should have tried the Black + Decker laser level instead.
Shelf number two was put up the same way, just without a repeat of the laser level debacle, thank you very much. We only used two corbels for the top shelf since a third one in the middle might hamper me from placing any tall objects in the middle of the bottom shelf. We can always add another corbel in the future if I change my mind.
Clearly I am going to use these shelves as my decorating playground. I don't know which is more fun -- making the shelves, or decorating them! Okay, it's decorating them.
Knowing that I can change the vignettes from season to season and year to year makes me happy. These are Target Bullseye Playground $1.00 velvet pumpkins and the pie sign is from Big Lots. They no longer sell the sign but you can get a similar Fresh Baked Pies sign online.
This darling "Blessed" plate and tobacco basket are from Hobby Lobby. The mini white clip-on pumpkins are from Dollar Tree and the orange pumpkins have been in my collection for a few years.
Similar:
This vintage-inspired farmhouse scale is from Decor Steals. The mini olive buckets filled with greens proved to be the best spot for some of my white mini clip-on pumpkins! I am totally in love with this display.
Similar:
Similar:
Preserved boxwood wreath
I think the new shelves look perfect alongside my estate sale farmhouse hutch in the corner. What camp are you in -- the traditional china cabinet camp or the more free-form shelves camp? I never thought I'd ever want anything other than a traditional cabinet yet here I am. And I'm loving it.
Here I've upended a vintage-inspired wooden French crate and placed it on top of a vintage New York Biscuit Company crate to create a makeshift side table for my ironstonee pitcher, hydrangeas and photo of our children.
Similar:
I think the new shelves look perfect alongside my estate sale farmhouse hutch in the corner. What camp are you in -- the traditional china cabinet camp or the more free-form shelves camp? I never thought I'd ever want anything other than a traditional cabinet yet here I am. And I'm loving it.
If there's anything you were interested in that I did not provide a source for just leave a comment and I'll be happy to get back to you.
Well, that's it until next time, friends!
I hope you enjoyed reading about my
DIY Repurposed Farmhouse Shelves
In The Dining Room
DIY Repurposed Farmhouse Shelves
In The Dining Room
and that I've inspired you in some way.


Leave a Comment!
Gorgeous! And it sure didn't take you long to get it styled. I hope you will show us how you style the shelves every season! I think it is going to be a great focal point. And give your husband a hug from all of us who have to do it ourselves caz we don't have someone who is willing able to enter into our decor struggles!
Kathleen these are really wonderful. They look awesome. Love the way you styled them too.
Have a great new week.
Kris
It looks lovely, Kathleen! And it can still be decorated like a traditional hutch or open shelving...beautiful!
Post a Comment