I began with a prefinished 48"L x 8"W plank in "Cottage" finish I picked up at a local big box home improvement store. I purposefully chose a board that already had a rustic, vintage-looking faux stain/patina to it. This saved me a lot of time, money and effort. I waited as long as it took (which ended up being months), until I found some affordable vintage-inspired french farmhouse-style corbels that were just perfect for my project.
Here's one of the corbels in all its glory. Already painted white and distressed? Um, yes please! The dream was getting closer to becoming a reality. However, life got in the way and this wall stayed blank for many more months. Then I finally cleared that side of the dining room of the inevitable clutter that accumulates when a certain someone uses that room as her office.
Here's the blank wall before.
And here's the back side of the corbel. There were two "keyholes" to be used for hanging. (As an aside I believe we ended up only using the top keyholes, since I knew I was never going to be placing anything really heavy on the shelf.)
My husband smartly made templates of the backs of the corbels, including exactly where the keyholes were. Then he taped the templates to the wall to get an idea of proper placement. We measured the length of the wall and made sure to place the corbels in a position where the shelf, once placed upon the corbels, would end up right in the middle of the wall.
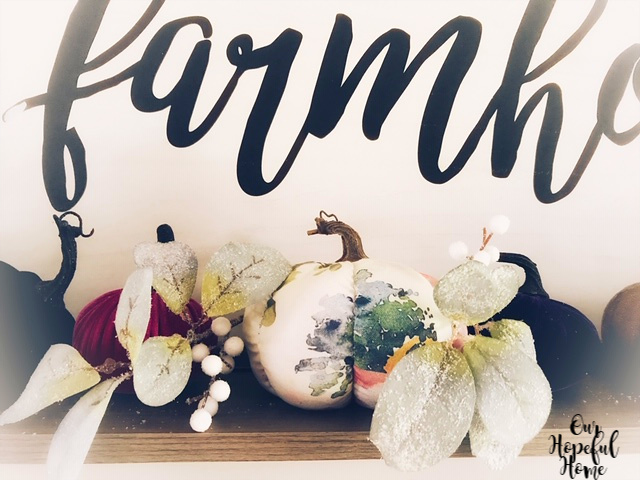
Once the corbels were attached to the wall with one wall anchor each, all I had to do was place the prefab board on top of them and the "shelf" was ready for decorating! I was thrilled to finally be able to properly display my large script "farmhouse" sign. Along with pretty floral and velvet pumpkins and lamb's ear, of course.
I mixed deep, jewel-toned velvet pumpkins, as well as romantic floral pumpkins, with sparkly lamb's ear and white berries.

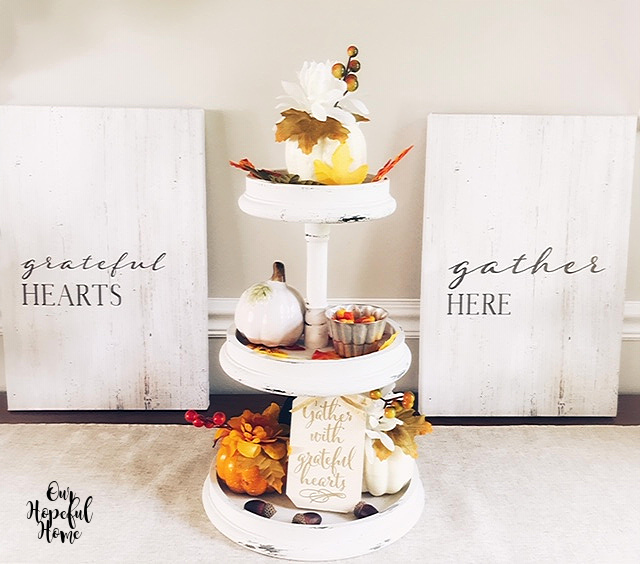
I had fun decorating the buffet as well. I went with the less is more approach and was quite happy with the outcome. I flanked it with two farmhouse wire pedestal cloches filled with remote candles. I added a two part wall art canvas that says "grateful hearts gather here" which I thought was very appropriate in light of the approaching Thanksgiving holiday.
For the centerpiece I placed a three-tier wooden farmhouse stand and styled it for fall. The display piece was originally black, but I took to it with white paint and transformed it with my Vaseline distressing technique. I filled the tiers with Dollar Tree pumpkins, leaves, acorns, a small wooden sign and a vintage baking tin filled with candy corn. I love changing it up for the seasons.
I also filled a large green carboy, seen to the left of the buffet, with pumpkin stems from Dollar Tree.
I absolutely love the look of the corbels in particular and the shelf in general. You can find prefab shelves with faux vintage corbels like this for mucho bucks online as evidenced below:
$198.00? Nah.
Here are the corbels I purchased. Including shipping for the corbels and the cost of the board ($8.99), my DIY rustic corbel French farmhouse shelf cost less than $45.00. If you're interested in purchasing the same corbels, leave me a comment and I will send you a direct affiliate link to Antique Farmhouse so you can purchase some for yourself.
Trust me when I tell you -- from experience -- that if you're really in love with a certain style of decor or particular decor element for your home, but it's too expensive for your budget, there's usually a way around it! Just be patient! I am the literal poster child for the axiom "Good things come to those who wait."


And here they are after I whitewashed them. I'll be sharing how I decorated them for fall in an upcoming post so stay tuned!
Don't forget to Pin it!


.png)


Leave a Comment!
I love how this turned out, Kathleen! Great job!
Oh Kathleen this turned out soooo nice. Love how you styled it too. Looks pretty.
Happy Fall!
Hugs,
Kris
You were right when you said good things come to those who wait. This was a great project! How nice that your husband is there to help. I remember trying to hang an oval mirror with 2 sconces with a tiny shelf underneath alone. No problem with the mirror and sconces, but if anyone had been there to video me hanging the shelf on poster putty to getting it 1)centered, 2) level, racing across the room to check level-ness before it fell off the putty. I drilled where the key holes made a bulge in the putty. I woulda made AFV! I was so proud of myself! What we do for decor. Now, years later, I think that wall would be a great place for a flat screen TV!
Kathleen, I love your vintage corbel farmhouse shelf.... everything, the sign, the corbels and those adorable pumpkins!
Thank you for sharing it at Create, Bake, Grow and Gather this week. I've pinned this to our party board.
Hugs,
Kerryanne
This turned into a beautiful project. And those shelves and corbels are so versatile. I especially love the two farmhouse wire pedestal cloches.
Making a template of the corbels was such a smart idea! It looks absolutely amazing!
The shelf and decor look lovely! I love my open shelves, too! Thanks for sharing at Tuesday Turn About... the party returns from the Christmas break this Tuesday, 1/7. Hope to see you there, and Happy New Year!
I want the link for the corbels!
Post a Comment