Christmas signs are eye candy, pure and simple. Whether placed inside or outside your home, they add a welcome dimension to your Christmas decor. I'm a big fan of using signs as wall art in my everyday decor, and that love carries over into Christmas decorating as well. Stick around because today I'm sharing a tutorial on how to make your own DIY rustic farmhouse shiplap Christmas sign easily and inexpensively.
I'm sure you've seen those small, wooden, seasonal signs at Dollar Tree -- for Christmas, fall, Thanksgiving, Halloween, Easter -- you name it. I've even been known to purchase a few of them myself from time to time. But sometimes you just gotta make your own sign. Even in those instances, though, Dollar Tree can come in quite handy. Take a look.
Not that there's anything wrong with this Christmas sign, per se, but it just wasn't really my style. However, I did like the look and shape of the sign itself. I thought it looked rustic and I love that. So I picked up three of them and brought them home to use in my own DIY Christmas sign project. Only I'd be using them for the back of the sign, not the front.
First, I used Goo Gone to take off the sticker that was on the back.
Then I painted the back of each sign with two coats of white paint. Once the paint was completely dry I used a ruler and a pencil to draw lines making the "wood" sign look like shiplap.
Then I used burnt umber acrylic paint to dry brush the "wood" panels to make them look distressed and aged.
I left the jute cord on one of them intact since I knew I was going to need some way to hang my finished sign. As for the other cords, I pulled them out and then filled in the holes with a tiny bit of all-purpose white caulk that blended in well with the white paint.
Then it was time to connect the three signs and turn them into one large sign. That required turning them all over to their original front sides and taping them together. I used masking tape, but duck tape would probably work better in the long run.
Christmas wall decals have been popping up all over the past couple of years and I love them. You can stick them on the wall, on mirrors, or on your own DIY sign! Originally I was going to stencil something but this was WAY easier!
 |
I made the red and black buffalo check bow myself. I like how it adds a pop of color.
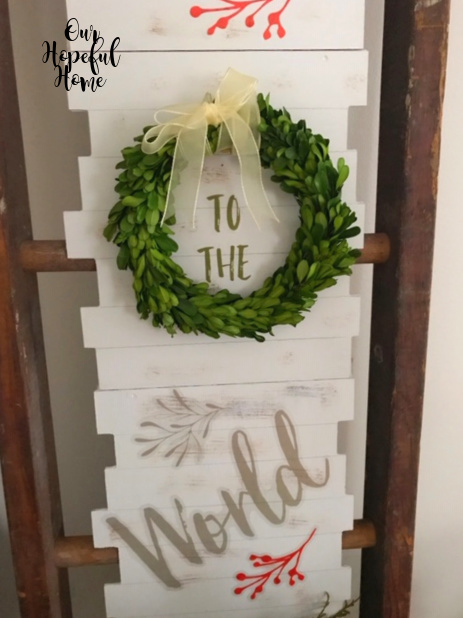
I love the contrast that the boxwood wreath provides, but any wreath would be fine. I just thought using a wreath to encircle the words "to the" was a unique way of adding interest to the sign.
Well, that's it for today, friends!
I hope I've inspired you in some way
and that you've enjoyed reading about my
and that you've enjoyed reading about my
DIY Rustic Shiplap Farmhouse Christmas Sign!
Don't forget to Pin it!


Leave a Comment!
So clever, Kathleen! It turned out beautifully!
Kathleen this is super cute. Look at you and your crafty self doing it again with something so sweet. Have a great and fun time getting ready for the holidays.
Hugs,
Kris
Awesome! And your tutorial was so simple and straightforward, too! I just love that living room corner!
Great idea--can't beat dollar store supplies!
This turned out so cute!! So clever! Pinned.
Post a Comment