Despite the fact that it's only September, retail stores are already hawking various Christmas items from decor to Christmas trees to craft supplies. So while shopping the other day, I came across a fun little farmhouse Christmas sign with a wood bead handle that I really wanted to buy. I even knew the perfect place for it. But I couldn't justify spending the money.
So I took a picture of it and walked away. Fast forward one week and I'm happy to report that with my DIY skills (and a little luck) I've come up with my own copy cat version of it and I'm happy to be sharing that with you today.
This post contains affiliate links. A purchase of any one of these items
helps to support this blog and its creative efforts at no cost to you.
To read more, please see my disclosure page.
I'm
sharing this as part of my monthly Thrift Store Challenge. So be sure
to read all the way to the end to see my blogger friends' repurposed
projects as well!
The Rules
Upcycle an item(s) from a thrift store, resale store, or garage sale into a new piece of decor.
There's no monthly theme.
There's no budget to stick to.
Meet the Hosts
******************************************
Our Thrift Store Upcycle group of bloggers is looking to expand -- and we need your help! Why not consider joining in our thrift store upcycle challenge on the last Thursday of each month? Make some friends while having fun and share your love of DIY with the world. It’s a win-win! Sound like something you’d be interested in? Just leave a comment at the end of this post with your contact info and a link to your blog. Someone will get back to you right away. We can’t wait to meet you!
********************************************************
The item I'm upcycling this month isn't from a thrift store -- it's from Dollar Tree. But I figured since the main element in this DIY only cost $1.00, and the rest of the project materials I had on hand so they were somewhat free -- it was all good to be shared in this Thrift Store Upcycle post. Heck, I spent less money on this project than I would have spent on an actual thrift store upcycle! In my book you can't go wrong with that.
So here's my inspiration. I spied it among the vast array of Christmas decor at Hobby Lobby (and I do mean VAST). The farmhouse Christmas sign with wood bead handle was not large, mind you. Maybe 5"x7" total. But there was just something about it I loved. (I just checked and it's out of stock online.) Recently, while thinking about upcoming Christmas decor projects, I remembered that I don't have an official manger to go with my nativity scene.
The holy family figurines are all white and I usually place white bottle brush trees around them and weave in some fairy lights for effect. But I could really see this Christmas farmhouse sign as part of the vignette.
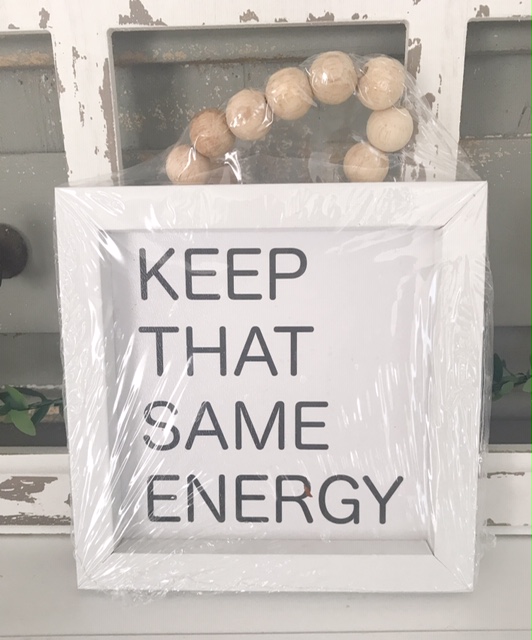
The planets must have been aligned because lo and behold, one week later, I found this beauty at Dollar Tree. There were only two of them and they were nearly hidden under a bunch of picture frames -- which just goes to show that you really need to LOOK for great finds when you're at Dollar Tree.
While "Keep That Same Energy" is not a sign I would want, I knew right away that it was meant to be because I could transform this little sign into the farmhouse Christmas sign from Hobby Lobby that I loved.
It was really easy to take it apart. I just pulled up on the metal prongs behind the canvas and then pulled the canvas out from the frame.
I flipped the canvas over and painted it with two coats of Rust-Oleum Chalked Ultra Matte paint in Linen White. It's become my go-to paint and color of choice.
Then I got to work on the graphics part of the project. When I work on something like this my main goal is to mimic the fonts as closely as possible. It's not always easy but sometimes I get pretty darn close. So how do I do it?
I use a website called wordmark.it. It allows you to plug in your words and see what they will look like depending on the font you choose. The above screenshot shows what it looked like when I plugged in the words "OH HOLY." If you could scroll down the page you would see what the words look like in all the other fonts installed on my computer. This is how I came up with the two different fonts I ended up using.
Once
the two coats of white paint dried it was time for my reverse transfer
method. I've used this method for DIY signs more times than I can count.
First I printed out the words in the appropriate size, then cut each of
them out and placed them inside the frame to be sure the dimensions would work.
All this was done in Word. For the words "OH HOLY" I used the font Cambria (size 100) and for the word "Night" I used the font Frutilla Script (size 125). For reference, the frame's insert was approximately 4 3/4" x 4 3/4".
Then I took a pencil and completely penciled over all the words on the back side of each of the words.
Once this was done I flipped the paper over to the front and using my sharp pencil I outlined all the letters. I always use painter's tape to hold down each of the words so that they don't move or slide while I'm tracing the letters.
And this is what I was left with. Once I filled the words in with a fine point Sharpie marker I was done with the graphics.
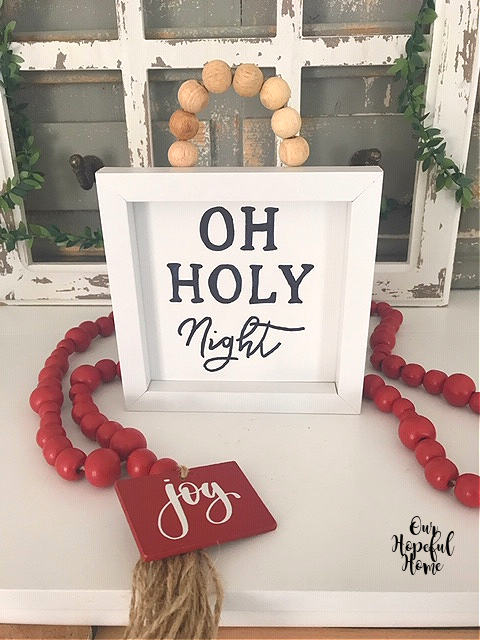
Then I replaced the canvas into the frame and voila. I thought it was appropriate to style the sign for this photo shoot with a red farmhouse wood bead garland I was really happy to find at Wal-mart. Yes, they're beginning to put out their Christmas stuff already!
While
I was loving the farmhouse bead garland handle, it was not standing
upright like the handle on the one from Hobby Lobby. So I took some floral wire I had on hand and used it to create a brace of sorts that
would keep the handle upright. I just literally threaded the wire through the beads and then duck taped both ends of the wire to the back of the frame.
I love the wooden tag with the word "joy," and the jute tassel. It's one of Wal-Mart's latest Christmas decor offerings. They also have two other versions that have different words on the wooden tag. Wal-Mart has been a bit slower to stock their shelves for Christmas than Hobby Lobby but I think that very soon they will be in full-on Christmas mode! So get ready!
Well, that's it until next time, friends!
I hope you enjoyed reading about my
Copy Cat Farmhouse Christmas Sign
With Wood Bead Handle
and that I've inspired you in some way.
Don't Forget To Pin It!
And now for more thrifty goodness!
Check out what my fellow upcyclers
created below!
Be sure to stay in touch:
Don’t miss another thrifty,
DIY home décor post!


Leave a Comment!
Your sign turned out great and your tutorial is very helpful. I take pictures of items I see in stores that I think I can replicate, too! It's fun to try to create something for a lot less money. I haven't started Christmas crafting, but after seeing this, I want to!
I love this project! Thanks for sharing.
Your sign version turned out just perfect! How lucky to find a frame so similar to the Hobby Lobby one. I use that same word transfer method you do and it makes projects so easy to complete when you don't have a Cricut ~ I call it the "old school method" LOL.
Post a Comment