TODAY I'M SHARING HOW TO CREATE A TASSEL CHRISTMAS TREE.
Mindlessly scrolling through my Instagram feed recently, I happened upon a
really cute and novel (to me) boho tassel Christmas tree. Then I began
seeing them on Pinterest as well. I knew right away that it would be one of
my 2020 Christmas crafts. I had never seen a tassel Christmas tree before
and I was intrigued. So how do you make your own tassel Christmas tree?
This post contains affiliate links. A purchase of any one
of these items helps to support this blog and its creative
efforts at no cost to you. To read more, please see
my disclosure page.

Lucky for me, I still had a stash of white yarn left over from a pom pom
making frenzy three years ago. I was totally thrilled with my
DIY pom pom garland back then. But I knew that today it was time for a new yarn Christmas tree
project.
Supplies Needed For DIY Tassel Christmas Tree Wall Art
1. yarn
2. scissors
3. cardboard
4. frame/shadow box/canvas with wood frame (use the back side)
Yarn, scissors, seam ripper, cardboard, wood slices.
Here's the specifications for the yarn I used for my tassels. You can use
thicker or thinner yarn depending on your preference and the type of tassel
you wish to make.
I actually found my finger protectors at Dollar Tree, but if you can't
find them there I put a link for them in the supply list above. When I saw
these I was thrilled -- I hadn't even known they existed! Genius! I've
always burned my fingers with the hot glue gun but these little gems really
saved me this time!
How To Make A Tassel Christmas Tree
This tassel Christmas tree project was a no-brainer for me considering that
I recently added large, fluffy tassels to a blanket I had purchased from
Costco (as seen in the basket above). You can see what I did and how I did
it in
How To Make Yarn Tassels For A Cozy Fall Throw. The post will give you a step-by-step guide to creating a tassel
so I highly recommend you look it over first.
One difference between these tassels and the cozy throw tassels is the size
of the tassel. The tassels for the Christmas tree wall art are very small in
comparison to the cozy fall throw tassels. Also, I used a piece of cardboard
as my "frame" to wrap the yarn around, rather than a book. The cardboard was
2.5 inches tall and I wrapped the yarn around it 25 times for each new
tassel. I made 15 tassels total.
Finally, where I used a crochet hook in the
tassel throw project to "hide" any leftover string, I used a seam ripper to do that for this
project.
And if you'd rather not have to make
the tassels yourself, you can always
I had this buffalo check farmhouse frame on hand and knew it would be
perfect for this project.
I just flipped it over to use as kind of a shadow box that I could place my
tassel Christmas tree in. You can see here how I placed the bottom five
tassels inside the frame just to get a sense as to how they would fit.
For starters I painted the outside of the frame white. And then I placed
faux woodgrain paper
into the frame with double sided tape as a great rustic background for the
tree. I also tested the size of the tree trunk with my wood slices.
For the tree trunk you can use a small stick picked up outside in your yard
or from a walk in the neighborhood. I just happened to have a bag of tiny
wood slices. You can also find similar
small wood slices online.
Then I went ahead and did a dry run (no gluing) by putting all the tassels
in place to see how the finished tree would look. It's important that you
space things out ahead of time so that you don't run out of room. Don't ask
me how I know this.
Once the wood slices were glued together and the trunk was dry and in
place, I glued down the bottom row of the tree. Here's the first tassel I glued on, right above the trunk. It's best to start from the middle and work your way outwards.
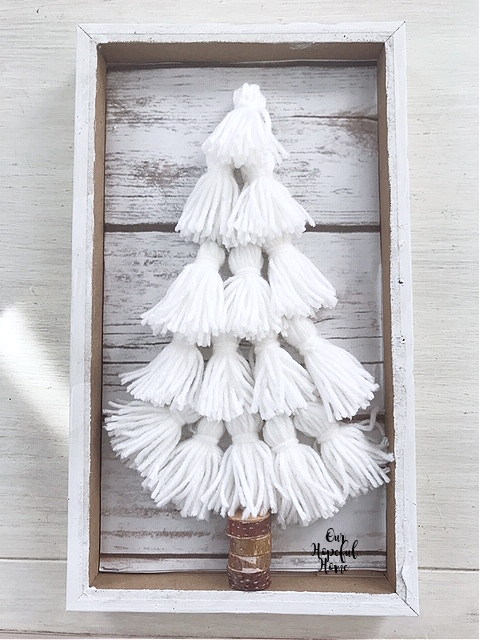
There should be five tassels on the bottom row, then four, then three, then
two, then one. I kept the top tassel sitting where I wanted it to ultimately
be so that I had a reference point while building my tree. I wanted the
spacing of the rows to be just right. I didn't want to build it too tall and
then have to start again.
Here it is, all but the fourth row (two tassels) finished. Each tassel
was positioned so that it hung over the tassel beneath it just a tiny bit.
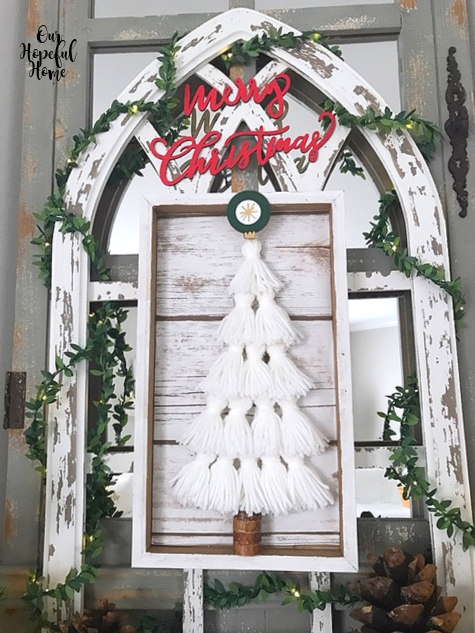
And here's the finished product hanging over the living
room mantel. While I liked the rustic look I had going, I felt it maybe
needed a bit more color.
So I added some red wooden Merry Christmas stickers to the
top of the display. Then I placed another wood sticker
ornament on the top of the tree.

They can be removed if I decide to go back to the more
plain look.

I played around with adding real greens to the display and
then trying it without.

I still can't get over the size of these sugar pine cones.
I love them.
I'm also loving the fairy lights on the mini pine trees and
on the vine laced around the outside of the cathedral
window. It looks so pretty at night.
I'm very happy with how the tassel Christmas tree turned out. It's more boho than my usual Christmas decor, but change can be a good thing, right? So how do you decorate
your mantel for Christmas?
Well, that's it until next time, friends!
I hope you enjoyed reading about my
DIY Tassel Christmas Tree Wall Art
and that I've inspired you in some way.
Don't Forget To Pin It!
Be
sure
to
stay
in
touch:
Don’t miss another thrifty,
DIY home décor post!


Leave a Comment!
Such a fun craft idea.
Amalia
xo
Kathleen this is too adorable. Love it. Happy Thanksgiving. xoxo
I really like this!! The addition of the red and the tree topper was a great idea! I like it plain, but the red adds that pop that makes it special!!
Post a Comment