Today I'm sharing how to bleach a flannel shirt, just in time for
fall!
This post contains affiliate links. A purchase of any one of these items helps to support this blog and its creative efforts at no cost to you. To read more, please see my disclosure page.
A few years ago my oldest daughter came home from college wearing a
thrifted, well-worn, altered flannel shirt. By altered I mean some areas
looked faded or bleached out, and a smiley face the size of a dinner plate
was sewn onto the back of it. The seam around the bottom might even have
been ripped out, but I can't remember specifically. Either way, I thought,
"Hmm. Interesting." I mean, it looked great on her. Just not my style.
Fast forward to a few weeks ago while attending a vintage market in
Michigan. As I moved about the fairgrounds in search of awesome vintage
finds, I noticed something interesting. Most of the vendors were selling. .
. . flannel shirts? Upon closer inspection I realized that they
weren't just any flannel shirts. They were vintage (or at a minimum,
thrifted), bleached flannel shirts. Who knew that was even a thing?
I actually saw a few I really liked. But the prices started at $20.00. And
I wasn't really there to buy clothes, now was I? So of course I stored the
DIY idea in the back of my head and valiantly shopped on.
Once home I was obsessed with finding a thrifted flannel shirt I liked at a
fair price. Goodwill to the rescue. I found this awesome red plaid flannel
Nautica Jeans Co. shirt on my first try and it was only $6.99. I looked
online and found these shirts for $40-$50. It was Size XXL (which is perfect
because I want to wear it as a jacket) and in great condition. So I was
stoked to start the project!
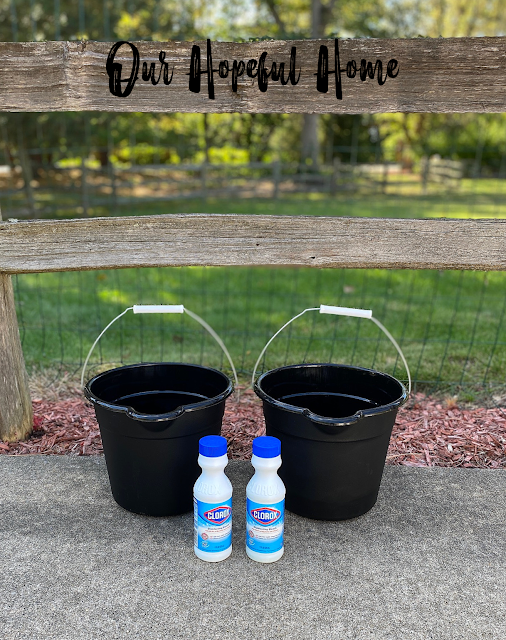
I picked up two small bottles of Clorox bleach and two plastic
buckets from Dollar Tree and then. . . . realized that it was still WAY too
hot to even think about wearing flannel shirts! So I washed the shirt, let
it air dry and then put it aside until the weather actually gave me
goosebumps. And would you believe that day was actually the first day of
fall? So. . . . . guess what I did on the second day of fall? Yep, I done
did it!
NOTE: I used buckets because we have a septic system as opposed to
city sewers, and pouring bleach down our drains is not recommended. If
you're not concerned about pouring bleach down the drain then use your
kitchen sink!
Also, be sure to wear old clothes you wouldn't mind getting splashed with
bleach!
Supplies for Bleaching A Flannel Shirt
1. Flannel shirt*
2. liquid bleach
3. two buckets (or use your sink)
4. rubber bands
5. rubber gloves
6. plastic grocery bag
*If you don't have any luck finding flannels at the thrift store, you can always pick up some fairly inexpensive flannel shirts online:
How To Bleach A Flannel Shirt
1. Wash your flannel shirt in the washing machine. Let dry fully (or dry in
clothes dryer).
2. Fill bucket #1 with water and bleach. I don't know the size of my Dollar
Tree bucket, but I know that I filled it about 3/4 full with water and then
I poured in one 11 oz. bottle of Clorox bleach. I'd say that roughly it was
a 3 or 4-to-1 ratio of water to bleach.
I don't believe there's a magic number involved. I think that each
situation will be different, depending on the fabric of your shirt (mine was
100% cotton), the vibrancy of the original colors, and how long you leave
the shirt immersed in the bleaching solution.
3. Button up all the buttons, including on the cuffs.
4. Lay the shirt flat, and fold the sleeves inward.
5. Using a rubber band, twist off the portion of the shirt/sleeves you
want bleached.
The higher up you twist off, the more of the shirt and sleeves you will
bleach.
6. Gently drop your shirt into the bucket just up to the level of the
rubber bands. (I say gently because you don't want to splash bleach water
onto yourself!)
7. Leave the shirt immersed until you achieve the bleachy look you desire.
I ended up leaving my shirt in the bucket for 2 hours. Be sure to check the
progress at least around every 15 minutes to make sure the shirt hasn't
gotten too bleached or that the integrity of the shirt hasn't been
degraded.
I could have left it in longer but I was just too impatient to wait!
8. Fill bucket #2 with water (or fill the other side of you sink) and then
transfer the bleached portion of the shirt directly into the bucket (or
sink). I used gloves for this process. I dunked the shirt up and down in the
fresh water and then squeezed out as much of the liquid as I could. Then I
removed the rubber band.
9. Place your shirt into a plastic shopping bag (to protect yourself and
your clothes from any remaining bleach) and transfer it to your washing
machine. Wash alone with regular detergent using appropriate water
temperature based on the type of fabric. Then, depending on your preference,
air dry the shirt or put it in your dryer. (I always air dry 100% cotton
clothing to avoid shrinking.)
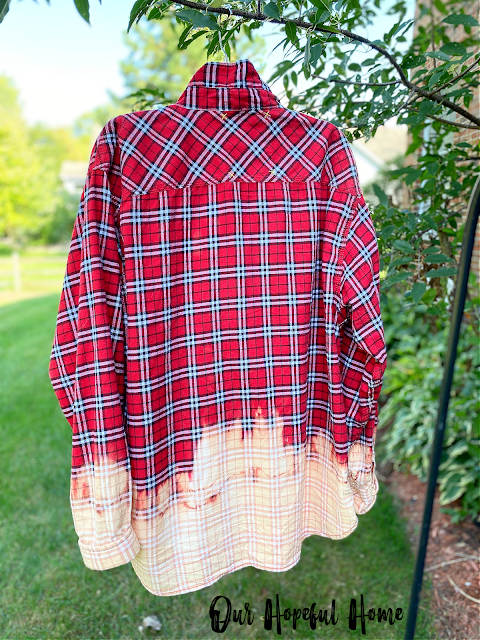
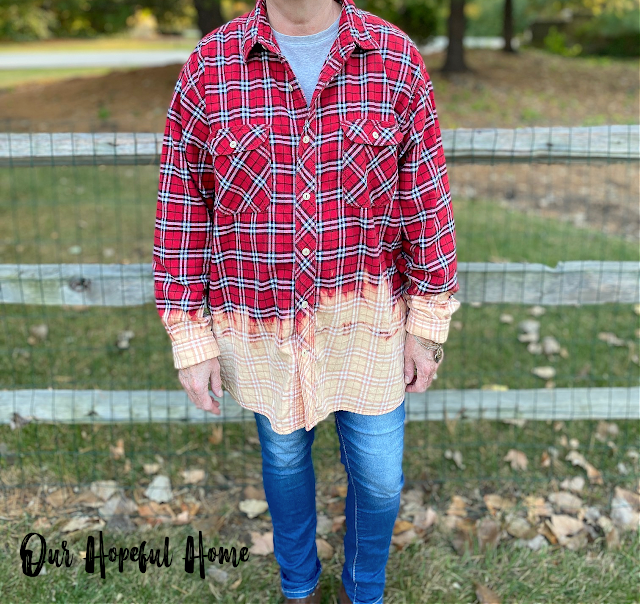
I have to say that I could not be more thrilled with how it turned out. (It
got two thumbs up from each of my college-aged daughters.) So much so that I definitely plan to make more of these altered, bleached
flannel shirts. I'm thinking a nice blue/green plaid combo next time. But I know I have to be patient while I wait for some more perfect flannel shirts
to turn up at Goodwill.
I love the fact that it's an XXL - that way I can layer it, wearing it like a
jacket (which is how I wear most of my tops lol).
They're perfect for this time of year -- perfect for those crisp fall days
and even crisper nights. Whether it's for a walk in the woods or a bonfire
with s'mores. Just throw on some jeans, boots and an altered flannel! And
you'll be good to go.
Well, that's it for today, friends!
I hope you've enjoyed reading about
How To Bleach A Flannel Shirt
and that I've inspired you in some way.
Don't Forget To Pin
It!
Be
sure
to
stay
in
touch:
Don’t miss another thrifty,
DIY home décor post!


Leave a Comment!
I've been seeing this look too, Kathleen. Thanks for sharing your tutorial and also letting us see how it looks "on!"
I noticed that a lot too. Flannel is the hot item for fall. This looks so cute on you. Thanks for sharing how to make this look. Happy Wednesday. xoxo Kris
Great job, Kathleen. I have a friend who makes and sells these shirts with transfers on the back. They a really popular right now!
Very fun. I watched a Youtuber who did something similar. She bleached the whole shirt, then after washing in soda ash (to take out excess color) and drying, she went back and applied three different colors of dye -- one color in each of three sections -- to give it an ombre look. So interesting.
Post a Comment