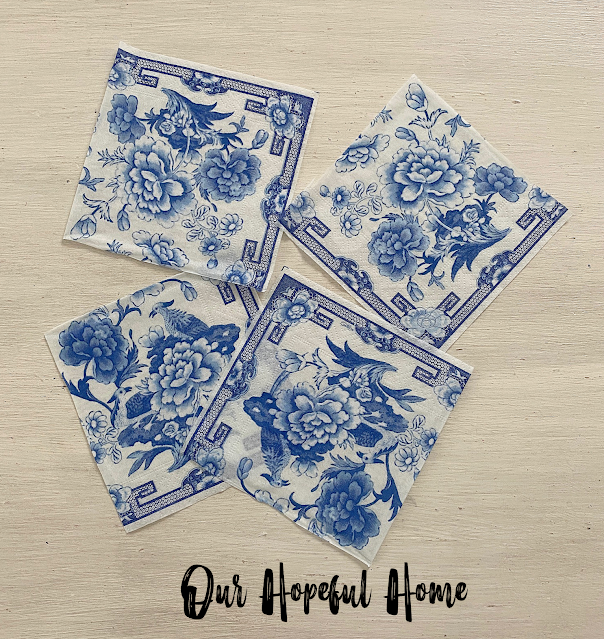
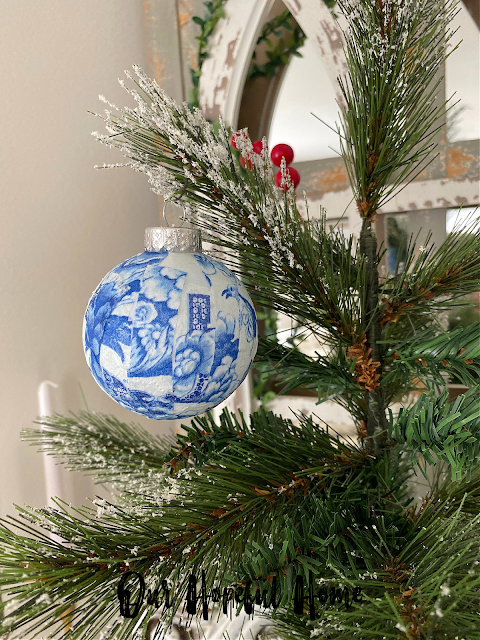
Today I'm sharing how to make chinoiserie Christmas ornaments.
This post contains affiliate links. A purchase of any one of these items helps to support this blog and its creative efforts at no cost to you. To read more, please see my disclosure page.
Anyone who has followed this blog (at least for the last few months) knows that I have become obsessed with blue and white chinoiserie EVERYTHING. So why not Christmas ornaments? They're fun and easy to make and don't cost a lot of money. And did I mention that they're elegant and timeless? Read on for the down low and the how-to!
When I came across these milky white Christmas ball ornaments at my local Dollar Tree I could not believe my eyes. Why is that, you ask? Well: 1. It was only September, and 2. These were the perfect balls for me to use for my DIY chinoiserie Christmas ornaments! So I brought 20 of them home, in two sizes (14 small and 6 large), and got started!
Why are they perfect? They're perfect because if you miss a spot, it won't be immediately obvious. The white color camouflages any gaps in napkin coverage.
The smaller sized ornaments were two for a dollar!

Here they are next to the large ornaments for comparison. The large ornaments were one dollar each.
I later came across these clear ornaments at Dollar Tree. Since they were a different shape I bought a few to mix it up, even thought they weren't white.
NOTE: For this craft, milky white ornaments work better than clear ones. That's because the white color of the ornament ends up bolstering the white parts of the napkin and makes the whole pattern (including the blues) seem brighter and more colorful. The final product packs more of a visual punch. That's why I chose just a few of the clear ones, for shape contrast. (However, you can always fill your clear ornaments with cotton or even white tissues first to create a white background for the project.)
Before we get started I have to say that I've laid bare my DIY chinoiserie method in a few different blog posts already. I've shared SO MANY tips and tricks that you really should check them out before starting the Christmas ornament project:
How To Make Chinoiserie Pumpkins DIY Decoupage
How To Make Chinoiserie Easter Eggs With Cocktail Napkins and Mod
Podge
Now you're ready to begin!
How To Make Chinoiserie Christmas Ornaments
Chinoiserie Christmas Ornament Tutorial
Tips For Making Chinoiserie Christmas Ornaments
- You are basically working with wet tissue paper! If you manhandle it too much It. Will. Rip. But never fear -- you can always just grab another piece of napkin and start again. There's basically no wrong way to do this. If something rips, just take a deep breath and make it a do-over!
-
In the past I've used foam brushes for my decoupage projects, but I
really loved using the
flat-edged paintbrush
for this project. The paint brush was much easier to control and I think
it applies the Mod Podge more consistently. I also think it was easier
on the napkin, helping me to avoid ripping it.
- Some people go over the whole thing with Mod Podge after the fact. I didn't feel that was necessary here. It's up to you. There's actually a spray for that: Mod Podge Ultra Gloss Spray On Glue And Sealer. I was unable to find a spray like this in any other finish than gloss.
-
I've also seen others take the ornament cap off before applying the Mod
Podge and napkins, then put it back on when they're done. I left the
ornament cap on so that I had something to hold on to and didn't have to
get my hands covered in Mod Podge! In addition, when I did try to
pull one cap off, it became bent and misshapen. (Remember, these are
Dollar Tree ornaments!) If you use different ornaments, or don't mind
being super-careful, you could probably take the caps out while you
decorate the ornaments.
- Finally, if you prefer the ornament cap a different metal color (i.e., silver versus gold), you can always use paint pens to change that OR just buy new silver caps or gold caps!
Originally, I placed these ornaments on a small, manageable flocked tabletop tree so you could get a good idea as to how they really look in action.
I was absolutely thrilled with how they turned out. So much so that I became inspired to create a chinoiserie chic Christmas tree!
I've since shared the final product in all its glory in a recent post. Head on over there and check it out:
Chinoiserie Chic: Blue, White and Gold Slim Flocked Christmas Tree
Well, that's it until next time, friends!
I hope you enjoyed reading about
How To Make Chinoiserie Christmas Ornaments
Be sure to stay in touch:


Leave a Comment!
Oh, my goodness these are absolutely gorgeous! I think I can do this and just may try my hand at it. Thank you so much for the tutorial!
Be a sweetie,
Shelia ;)
These are gorgeous, Kathleen and look so high-end. Gotta love Dollar Tree!
I share your love for blue and white. These are lovely. Am gonna keep my eyes open for white bulbs;will find them thrifting somewhere. Now to find pretty b &w napkins!
I love these! Thank you so much for sharing your crafty tips!!
Post a Comment