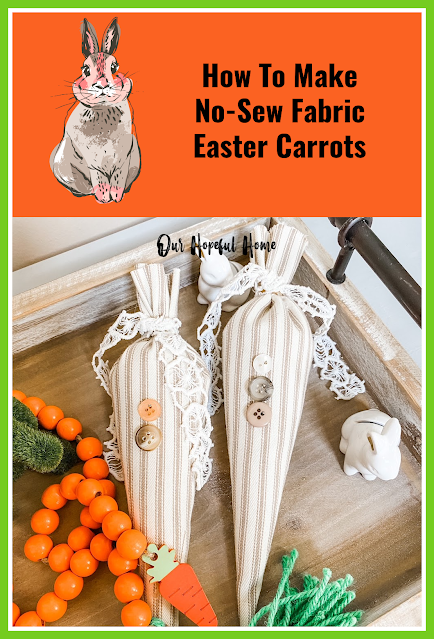
Today I'm sharing how to make no-sew fabric Easter carrots with pretty
much nothing more than a paper template and some fabric.
This post contains affiliate links. A purchase of any one of these items
helps to support this blog and its creative efforts at no cost to you. To
read more, please see my disclosure page
After seeing some rustic fabric carrots on a high-end retail website, I
decided to try and make some on my own. I looked for different tutorials
around the web and came up with my own version of a DIY fabric Easter
carrot.
Yes, you can buy some already-made decorative carrots. Many of them out
there consist of string or yarn, or strips of material, wrapped around a
carrot shape. I thought my look was more rustic, farmhouse and romantic so
I went with it.
Let's get started!
SUPPLIES FOR MAKING
DIY FABRIC EASTER CARROTS
5. scissors
6. paper
7. pencil and/or Sharpie
9. rubber bands
OPTIONAL SUPPLIES
HOW TO MAKE NO-SEW
FABRIC EASTER CARROTS
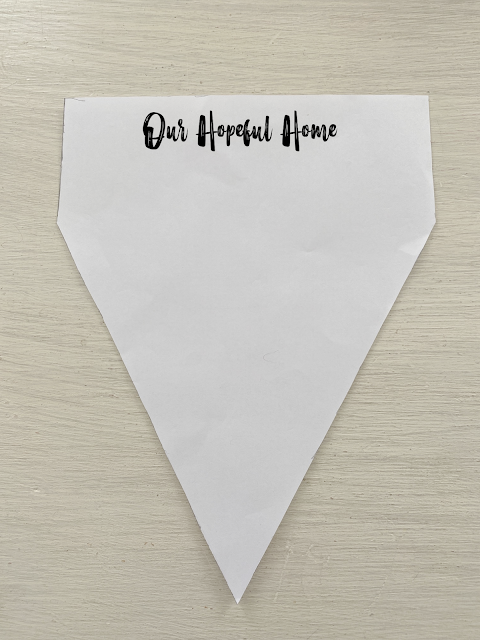
Step 1. Place an 8 1/5" x 11" piece of paper vertically on your
work surface. Measure across the bottom edge of the piece of paper,
using a pencil to mark the approximate mid-point.
Step 2. Measure down approximately 3" from the top on both side edges of the
paper and make a mark on each side.
Step 3. From that mark on both sides, draw an angled line down to the
pencil mark at the mid-point on the bottom of the page.
Step 4. Cut out your paper carrot template.
NOTE: These instructions can be used no matter the size of the carrots.
You can readjust the paper size and/or three-point measurements
according to your needs. My carrots were approximately 10" tall and 6" around at its widest part.
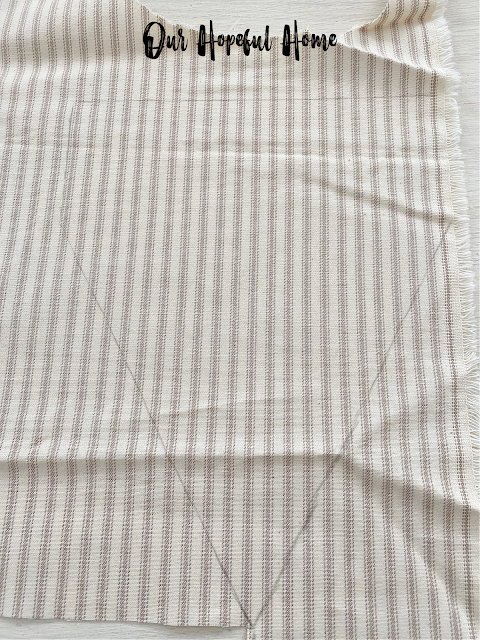
Step 5. Place the paper template onto the fabric
6. Then, using a Sharpie marker or pencil, trace around the outline of your
template.
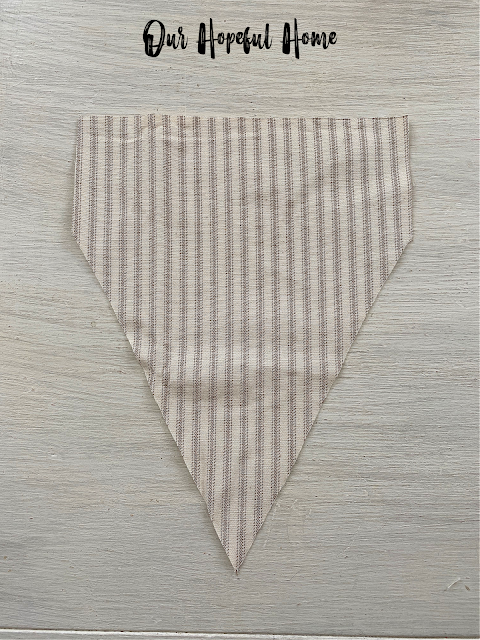
7. Remove the paper and cut out the carrot form. Then repeat steps 1 through 6 for as many more carrots as you want to
make.
NOTE: If your fabric is wrinkled like mine was, be sure to iron
the fabric either before or after you cut it out.
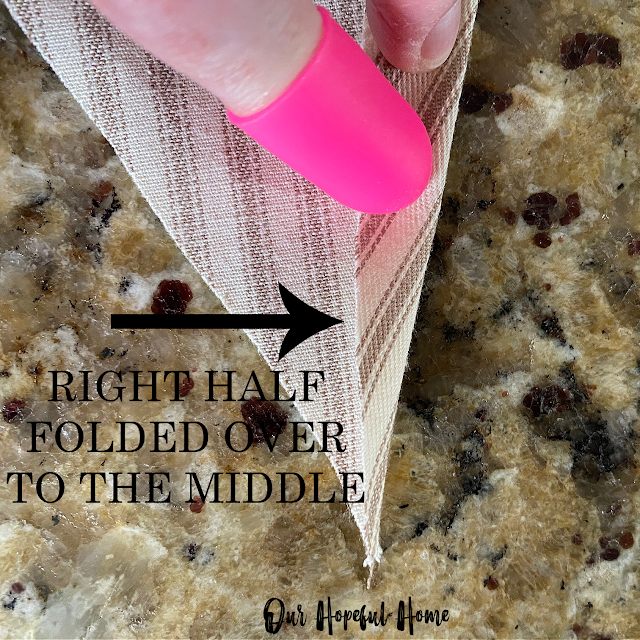
Step 8. Lay the fabric, front side down, and fold the right side over to
the mid-way point.
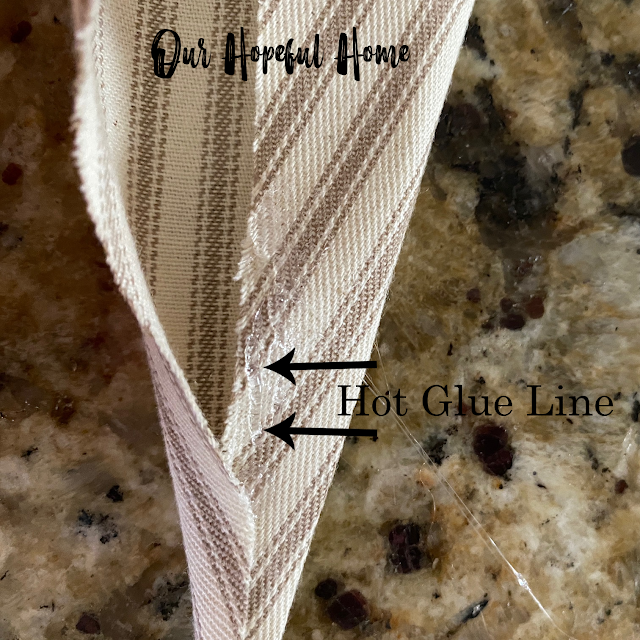
Step 9. Begin squeezing out hot glue on top of the fabric you've just
folded over from the right. Then cover that by bringing over the fabric from
the left.
Be careful not to glue all the fabric from the right onto the back side
of the carrot because then you won't be able to stuff the carrot with
poly-fil!
Step 10. Then continue, gradually, to work your way up the piece of fabric
with the hot glue. Watch out for your fingers! Hot glue guns can really burn
your fingers -- so be sure to use finger cap protectors.
Once you reach the spot where you made the 3-inch mark on each side,
stop gluing.
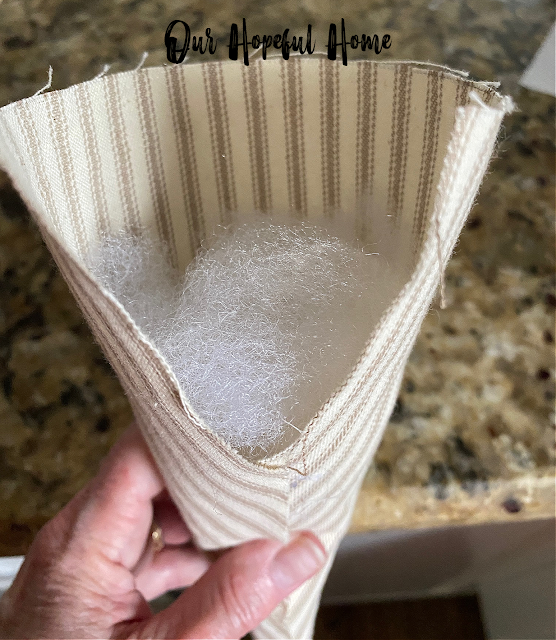
Step 11. Begin filling your fabric carrot with poly-fil. The hardest part
is getting the filling all the way down into the pointy bottom of the
carrot.
To do this you can use a number of tools: pencils, chopsticks, the handle of a wooden spoon, popsicle stick, bamboo skewer,
hemostats and more. I used a combination of a pencil, wooden skewer and my
finger to get the poly-fil as far down into the narrow pointy bottom of
the carrot as I could.
NOTE: Once I finished making all my carrots, I realized I could have
filled the pointy bottoms with poly-fil as soon as I had glued that
lower portion together. That way I would have had a much easier time making sure that the
narrow point at the bottom of the carrot got sufficiently filled.
Once the bottom area is sufficiently full, continue stuffing more poly-fil
into the carrot, all the way to the top of the opening.
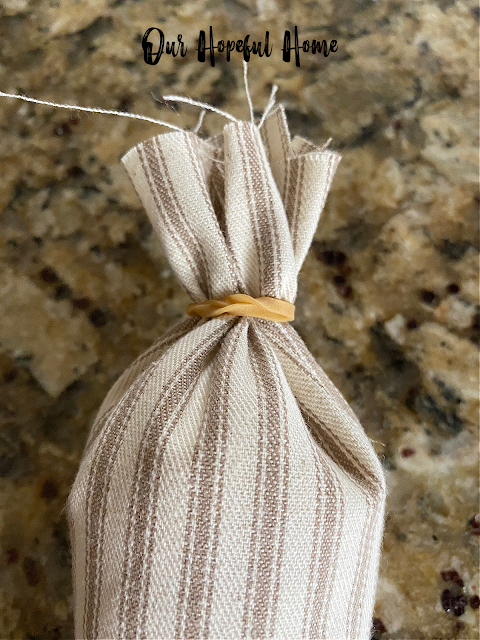
Step 12. Gather the top fabric together, twist it closed and secure with a
small rubber band. Cut away any stray strings, etc. Then cover the rubber
band with some pretty vintage lace, ribbon, or twine. You can tie it in a
bow or just allow it to hang down loosely.
Step 13. (OPTIONAL) Using your scissors, cut the left over fabric at
the top into narrow strips all the way around, creating somewhat of a
"fluffy" top. I chose not to do this since I thought they looked pretty good
without adding that step. It's all about personal preference here. And if I
ever change my mind I can go back and cut them up! You could actually mix
things up and cut the top of some carrots but not others.
Step 14. Lastly, hot glue your decorative buttons onto the fabric
carrots.
NOTE: I couldn't decide how I felt about using the buttons versus
leaving my fabric carrots plain, sans buttons. So instead of gluing them on,
I merely pinned the buttons onto the carrots with straight pins, one
pin per button. That way, if I change my mind, I can always easily remove
the buttons and revert to a plainer look.
I styled the carrots on a large wooden tray with handles, adding some moss covered bunnies and colorful orange Easter wood bead garlands. The small white porcelain bunnies are actually dining place card holders but they are so cute I just had to add them to the tray.
The tray will most likely be updated, as will the buffet top in general, and when I get it fully decorated I will be sure to share, either here or on Instagram.
I think they add a great pop of color to an otherwise neutral vignette,
I also added a small nest with brown speckled eggs into the mix as a sure sign that spring is approaching!
So, to recap, you can make these fabric carrots in any size and out of any
fabric you prefer. (I ended up very happy with how they ultimately turned out using the ticking stripe cotton duck fabric). You can also add buttons, or not add buttons. You can use vintage lace,
or ribbon or twine. The ultimate look is up to you!
Well, that's it for today, friends!
I hope you've enjoyed reading about
How To Make No-Sew Fabric Easter Carrots
and that I've inspired you in some way.
Don't Forget To Pin It!
Be sure to stay in touch:
Don’t miss another thrifty,
DIY home décor
post!







Leave a Comment!
Super cute, Kathleen. Nice tutorial, thank you!
These are so cute. I just bought a set of these at Rustic Fox in North Aurora. You could be selling yours there! Have a good week. xoxo Kris
These are adorable, Kathleen!! I love the neutral fabric you chose paired with the lace. It makes them seem like elegant carrots...not so loud :) Amazing project!!
I love these kathleen! You diid a great job; I am loving the neutral colors. I wanted to make some using a paper mache form but your way is much easier. XO- MaryJo
Great tutorial! Love your rustic look. I bought some metallic orange material yesterday--thinking ahead for pumpkins; wonder if I might make a few carrots! I made some wooden carrots last year with wooden spindles cut in half (from a magazine rack I'd let weather in the yard!). Painted in oranges, whites, and purple (heirloom carrot color!) and topped with a variety of greenery, they came out well. Followed your advice and got 2 cute Easter decorations at DT! Kathy A
Kathleen, these are great! Pinned!
Hi Kathleen, just dropping by to let you know I am featuring your adorable carrots tomorrow for Feature Friday! Blessings, Cecilia @My Thrift Store Addiction
Such a cute project Kathleen!
Thank you for sharing it at Create, Bake, Grow & Gather party this week. I'm delighted to be featuring it at tonight's party and pinning it too.
Hugs,
Kerryanne
Kathleen,
Thanks so much for sharing this tutorial!! I hope to find the time to give it a try....Love how yours came out!!! Very Pretty!!!
Hugs,
Debbie
Post a Comment