This year I added a new flower variety to my flower garden: ranunculus. They are my absolute favorite flower, right after hydrangeas and peonies. They are also super expensive -- so I thought growing them myself would be a great way to save money while still getting to enjoy their beauty.
This post contains affiliate links. A purchase of any one of these items helps to support this blog and its creative efforts at no cost to you. To read more, please see my disclosure page.
Have you ever jumped into a project feet first and later found out that perhaps you were a bit hasty? This project turned out to be like that.
While I was super excited to grow ranunculus in my raised flower beds, I didn't know that ranunculus are cool season flowers that grow best in spring-like temperatures around 55 degrees. So in climates where ranunculus are not winter hardy (zones 4-7) the corms should be planted in winter or early spring for flowers in early summer. (Keep reading to learn the name of a ranunculus variety that may fare better in warmer temperatures.)
Clearly I've missed that train! It's mid-to-late May in Zone 5 which means it's LATE spring/early summer. I read somewhere that once the average daily temps rise above 70 degrees ranunculus will start to brown and die. Where I live that's probably 2 weeks from now!
NOTE: In warm zones (zones 8-10), the corms are planted in the fall so they will bloom in late winter and early spring.
Despite learning this disturbing-to-me fact, I opted to go ahead and plant my ranunculus corms anyway. And here's my story.
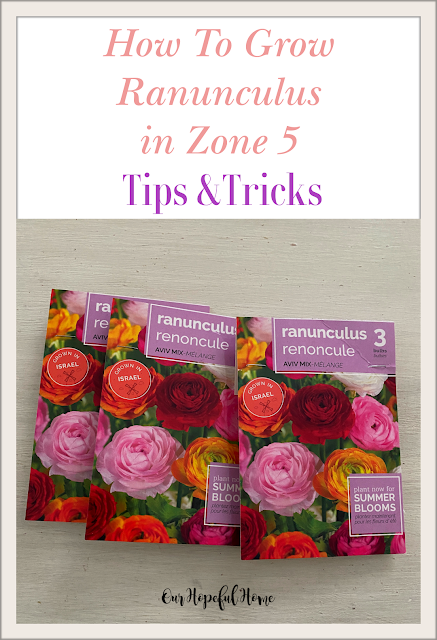
I got the idea to grow my own ranunculus after stumbling across ranunculus corms for sale at Dollar Tree -- Aviv Mix variety. This was the first year they offered them in my area. So I picked up all the ranunculus corm packages they had -- nine packages with three corms each.
After I bought the corms I researched how to grow ranunculus and came across a YouTube video about Dollar Tree corms in particular. Let's just say the video was not a glowing recommendation for their success. But I wanted to try it anyway.
Ironically, I then saw what looked like the same brand of Aviv Mix ranunculus corms for sale at Home Depot (but more expensive, of course). And I bought them as well in the event the Dollar Tree corms were unsuccessful. Interestingly, the Home Depot package looked pretty much exactly like the Dollar Tree package.
AVIV RANUNCULUS
In the event you don't find Aviv corms in your area, Amazon also carries Aviv ranunculus corms in many different colors:
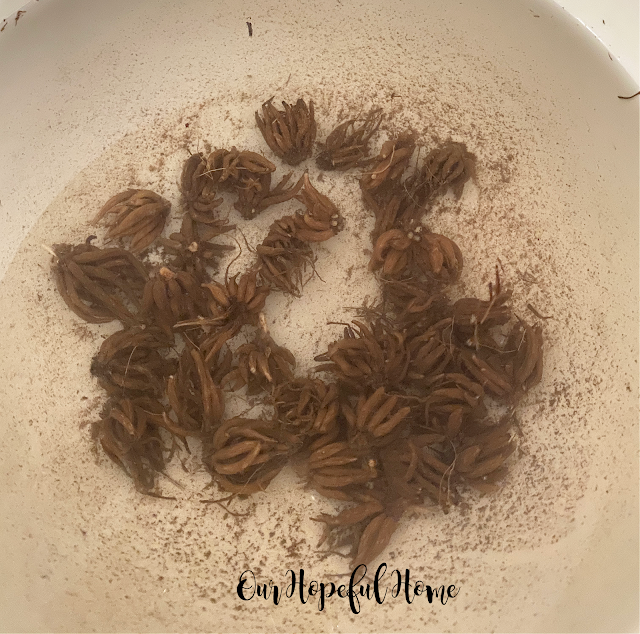
Actual ranunculus corms look like spiders. Plain and simple. It's ironic when you think about what beautiful flowers they produce.
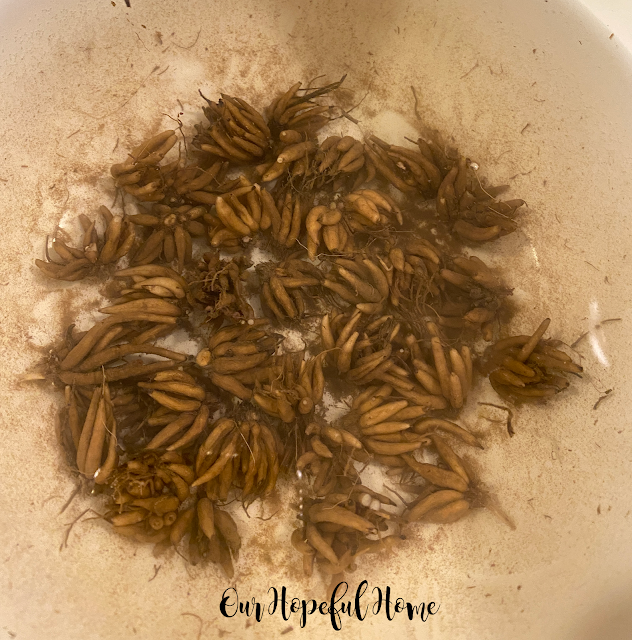
First I soaked the corms in warm water for 2 hours.
During this time you can see the "spider legs" grow larger and fatter.
Next, I dried off each corm and planted them in their own individual cells, pointy side up, in a large seed starting tray using Jiffy Organic Seed Starting Mix. Then I watered them, making sure not to oversaturate them.
For some reason Amazon won't allow me to link to that mix, but I know you can get it at Wal-mart. You can always just search the mix name on Amazon to find it (I will not receive anything if you buy it).
If you want to order something similar from Amazon I'd go with Miracle-Gro Seed Starting Potting Mix.
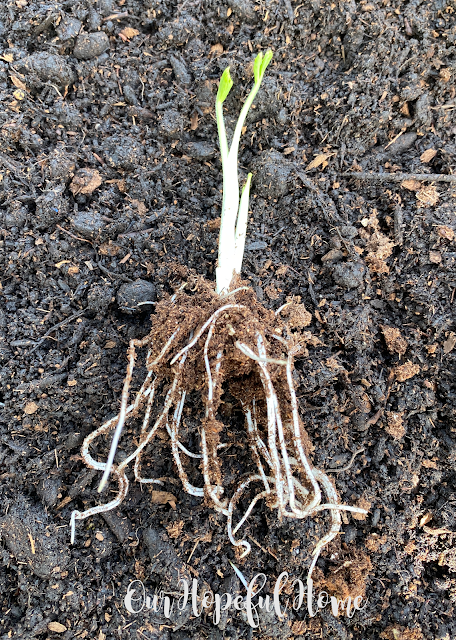
Then I placed the tray in a cool, dark place -- the basement! And within just a few days I had sprouts shooting up from the dirt. I was super excited. Funnily enough, ALL the corms grew -- Home Depot's AND Dollar Tree's. The seedlings in this picture are 15 days old. I would've planted them outside before they were 15 days old (probably around days 8-10) but I was out of town at that time.
Here is a Day 15 sprout. As you can see, this baby is ready to be planted outside in the garden!
I ended up planting 50 ranunculus seedlings in one of my raised garden beds. As for spacing, I've read that you should space them anywhere from 4 to 9 inches apart -- go figure. Mine ended up being around 4 inches apart. I wanted to plant as many as I could in the event some of them ended up being duds.
If you're planting ranunculus seedlings in containers, you can plant them 6" apart. I've read recommendations to use one plant per 8" pot, 2 plants per 12" pot and 3 plants per 18" pot.
I have some left over seedlings that I hope to get planted into pots very soon.
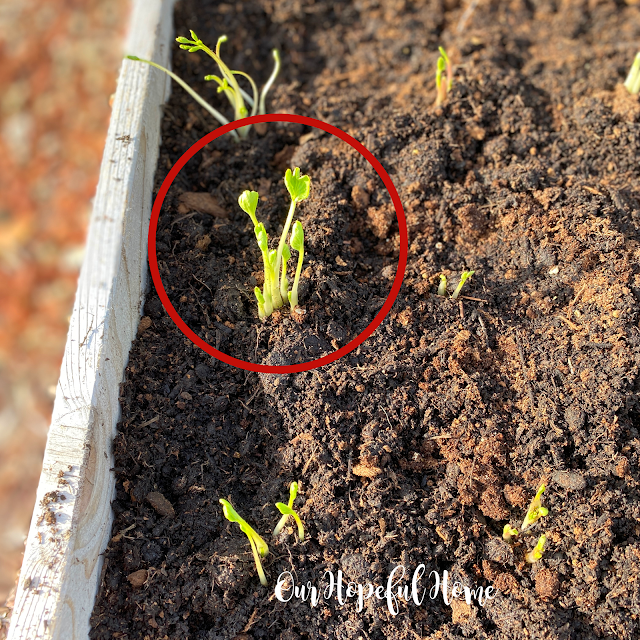
For purposes of this post I wanted to document at least the first week after planting. I of course plan to update this post with a Part 2 when and if I actually get some flowers! So here's the first week:
DAY 1
DAY 2
DAY 3
DAY 4
DAY 7
Ranunculus only need to be watered when they're seriously dry. I, however, watered them every day as the average temps here have been in the 60's to 70's with full sun, and the raised bed was drying out very quickly.
I looked up this type of ranunculus and Aviv ranunculus were bred for the cut flower market and have big, 4 to 5” blossoms on long stems. I'm completely worried about their viability due to their delicate nature but I so want them to grow!
AMANDINE RANUNCULUS
I did find out (too late) that there is actually a variety of ranunculus that was bred to withstand warmer temperatures -- Amandine ranunculus. Nowhere can I find an actual temperature guide, but they say they have an "improved warmer temperature tolerance" which extends the flowering season.
Also, their planting time is listed as just "spring," rather than "early spring," which would have given me an advantage due to the lateness of my corm planting this year.
Obviously, if I had known about Amandine ranunculus from the beginning I would have purchased those corms instead. However, I leave you with one caveat about Amandine ranunculus corms: they're pretty expensive. It looks like 20 corms will cost around $30.00.
Although if each corm produced a plant that produced 9-15 stems (as advertised) you would more than get your money back in flowers due to the expensive nature of florist-bought ranunculus.
Whether I end up with gorgeous flowers or brown and dried out seedlings, I promise I will share the outcome with you along with more ranunculus growing tips in How To Grow Ranunculus in Zone 5: Part 2!
What Zone do YOU live in?
I hope you've enjoyed reading about
How To Grow Ranunculus In Zone 5: Part 1
and that I've inspired you in some way.
FOR AN UPDATE AS WHAT HAPPENED NEXT SEE HOW TO GROW RANUNCULUS IN ZONE 5: PART 2!








.png)


Leave a Comment!
This is great Kathleen that you got dollar tree and Home Depot ranunculus to grow. I did not know that about our area having to have those planted early Spring when it is cooler. Have a great week and Memorial Day.
Hugs
Kris
What a gorgeous flower. I moved home to Maryland after living in Florida for 29 long years. I can grow so many pretty flowers in Maryland. I am giving these beauties a try. Thank you, Kippi
So beautiful can't wait for you to show us the wonderful perennials in bloom.
Post a Comment