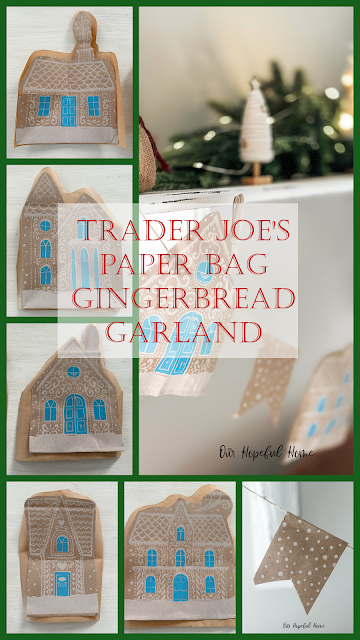
Just in time for the Christmas season I'm sharing a very cute and easy Christmas craft that I made with last year's Trader Joe's Christmas shopping bags -- a gingerbread house garland. Gingerbread houses are all the rage this Christmas!
You don't need to spend a lot of money on craft supplies to make a fabulous craft project. So grab a cup of your favorite hot drink and let's get started!
Last year my daughter and I made a trip to Trader Joe's for some holiday inspiration, and both of us came home with a few paper bags full of goodies. Lucky for us, the paper bags were imprinted with an array of adorable gingerbread houses of different designs with a dreamy snowflake background.
We both knew there was crafting potential as soon as we laid eyes on them. So we promptly stored them away for this year's Christmas crafts!
While I recently learned that many people used the paper bags as Christmas wrapping paper and gift tags, I decided on using them for something else. Why not a one-of-a-kind Christmas garland?
Before starting the project I searched online for some guidance -- and wouldn't you know I found a Facebook Live video by DIY Dreaming explaining how she used her Trader Joe's bags to make a Christmas garland last year! I was happy to have a tutorial to get me started. While I generally followed her tutorial, I did make a few changes.
SUPPLIES FOR MAKING A GINGERBREAD HOUSE GARLAND
1. gingerbread house paper bags
2. scissors
3. twine
4. roll of craft paper
5. glue gun
6. glue sticks
8. masking tape
I began by cutting out all the houses, even the house that says "Trader Joe's" on it. (I'll fix that later.) I left a bit of a buffer around the images and didn't try to cut them out perfectly. Then I traced around those cut out houses onto brown craft paper to create the backs for the houses. Yes, they needed backs because I was going to stuff them!
While there are six houses total (and I stuffed them all) I only used four houses due to the size of my garland. Obviously, if you have a longer area to cover and more than one bag you can make many more houses!
NOTE: You'll initially need to cut down one of the side panels of the the bag and then cut out the bottom of the bag which is of no good use for this craft project. Then you can spread the bag out flat and cut out your houses.
I hot glued the craft paper "backs" onto the front of the houses, leaving an opening at the bottom for stuffing the Poly-fil into. Once I inserted the Poly-fil into each of the houses, I hot glued the bottom openings closed. And they were ready to string up.
NOTE: Poly-fil usually comes with a stuffing stick. It’s really just a thin stick you can use to shove the poly-fil into whatever you're filling. In order to fill the houses you will need one of these sticks or a wooden skewer or even a pencil! I found that when it comes to filling for this project “less is more.”
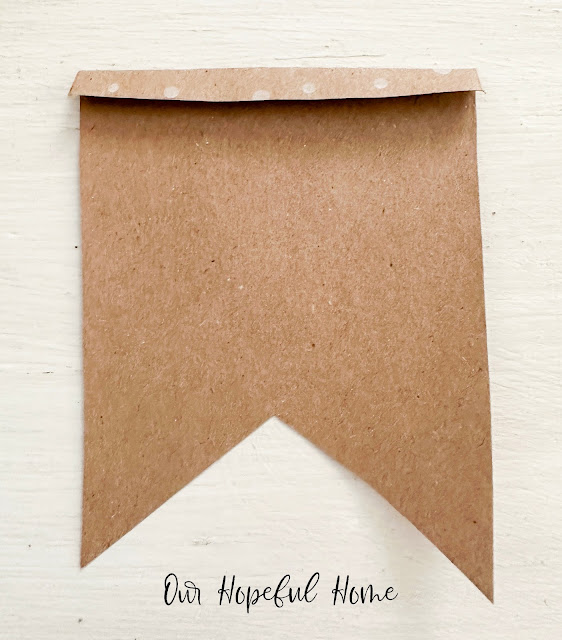
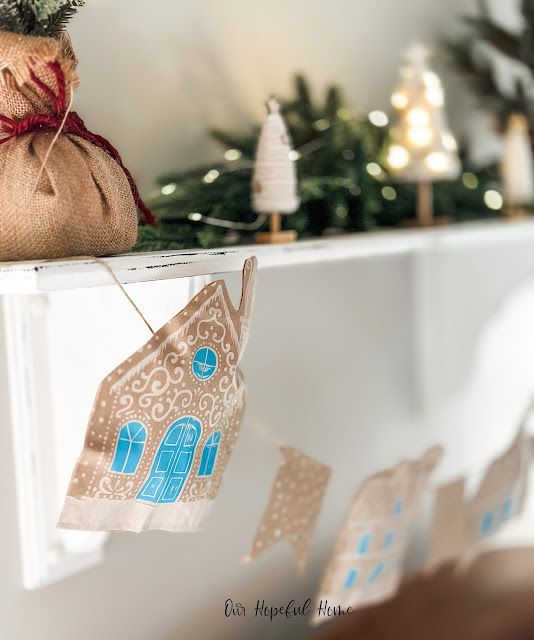
I also wanted to have some type of pennant to place between the houses. So I drew a pennant template free hand and used the snow-covered areas of the paper bag to create them. For reference, my pennant measures 3.25 inches across (at the top) by 4 inches (tall).
I love how the pennants turned out!
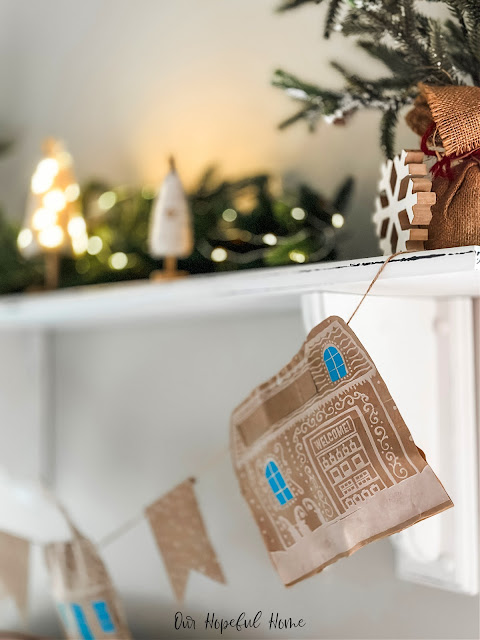
As for the house that said Trader Joe's on it, I just cut out a piece of craft paper to cover the area and hot glued it over the words. It worked like a charm! From a distance you can't even tell. I did still leave the word Welcome on it, though!
So how did I attach the houses and pennants onto the twine?
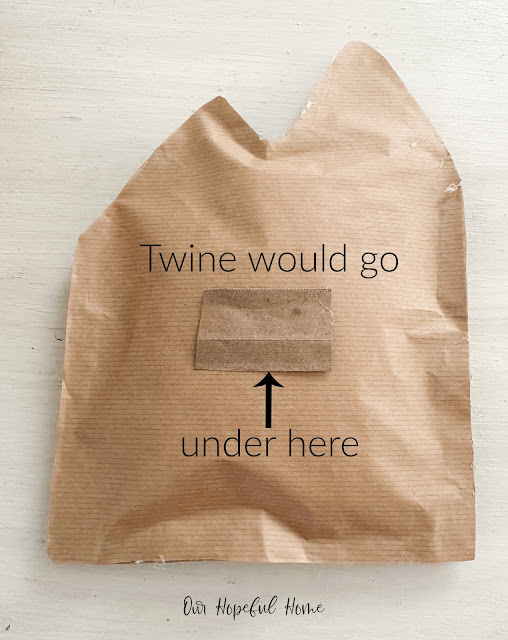
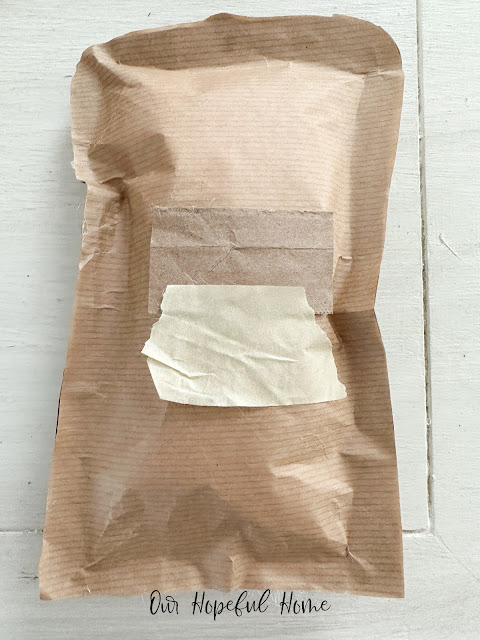
I originally used some left over paper bag pieces to make little square "flaps" that I glued onto the back of each house (like DIYDreaming did). The flaps were supposed to act as a way to attach the houses to the twine and still be able to move the houses freely on it.
Unfortunately, that didn't work for me -- the houses fell forward and then fell off the twine.
Ultimately, I had to go back and secure the little paper flaps with masking tape and then thread the twine through the space left under the flap.
As for the pennants, I just folded a small portion of the top down and used the fold as a means to hang them on the twine. That worked pretty well.
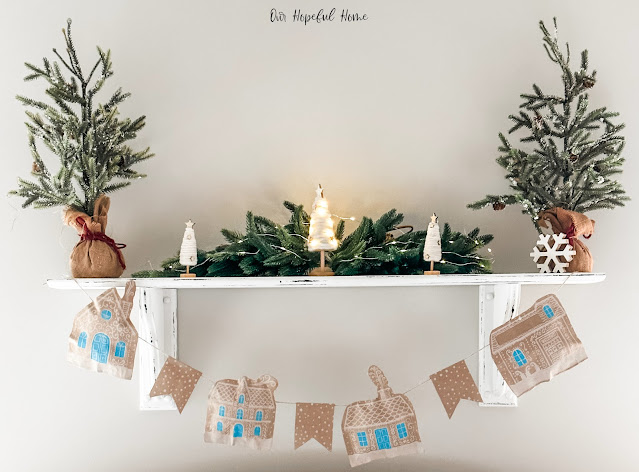
And here's the finished gingerbread house garland. I love the simplicity of it. It's a no muss, no fuss project that I think turned out beautifully!
I think the houses are definitely generic enough to be left up as winter decor even after Christmas. I think they have sort of a scandi vibe going for them.


.jpg)
.jpg)
.jpg)

.jpg)







.png)


Leave a Comment!
Kathleen, LOVE this garland and now once again, I have TJ envy, lol.
(The nearest one to me is 60 miles.) Blessings, Cecilia
Kathleen this is so cute. You should take a set of these back to your Trader Joes and let them see how you made them and they could hang them in the window of the store. How cute would that be. Gotta love Trader Joes. Have a great week. Hugs. Kris
Your banner is adorable Kathleen! I wanted to stop by and tell you that and thank you ladies so much for hosting the Vintage Charm Party! I appreciate it!
Post a Comment